CSML (Conversational Standard Meta Language) is an open-source programming language dedicated to building chatbots.
It acts as a linguistic/syntactic abstraction layer, designed for humans who want to let other humans interact with any machine, in any setting. The syntax is designed to be learned in a matter of minutes, but also scales to any complexity of chatbot.
CSML handles seamlessy and automatically short and long-term memory slots, metadata injection, and can be plugged in with any external system by means of channel integrations or custom APIs, as well as consume scripts in any programming languages using built-in parallelized runtimes.
To learn more about CSML, you can read this article.
Build your chatbot with CSML Studio
The easiest way to develop CSML chatbots is by using the , using a sample bot available in your library or by creating your own.
Each bot gives you a full access to the CSML framework - a set of specialized tools to make and customize your chatbots : code editor, chatbox, apps, functions and files library, analytics and channels.
Create your own conversational experiences
You can create your own conversations by modifying an existing flow or .
A flow is a CSML file which contains several steps to be followed during a conversation with a user. The first instructions have to be placed in the start step, then you can move from a step to the next one using goto stepname, and finish the current conversation using goto end. Each step contains instructions on how to handle the interactions within the step: what to say, what to remember, where to go...
For the bot to say a sentence, you just need to use the keyword say followed by the you want to send.The keyword say allows:
to display a message: text, questions, urls, components (image, video, audio, buttons…)
to simulate behaviors, such as waiting time (Wait) or message composition (Typing)
Manage interactions
Like a human, a chatbot is supposed to understand and react to messages sent by the user.
In a conversational logic, CSML allows the chatbot to wait for a user answer using the keyword hold, and interpret the expected user input (called event) to trigger an action.
Here is an example of a simple interaction where the bot is asking if the user likes guitar and waiting for two specific answers in order to trigger actions.
Memory and local variables
is essential in the CSML logic. When two people are chatting, they constantly memorize and update information to be reused in future discussions.
CSML provides two types of variables: local variables, with a very short life cycle, and persistent variables, called memories.
The memories are assigned as followed use the keyword remember and can be reused in every step or in a future conversation, while the local variables are executed within one step, assigned with the use keyword.
You can output any variable into a string value with the double curly braces.
Connect apps and execute your own functions
You can select an existing integration in the apps library or add your own function coded in any language. Find a few examples in our and how to use functions in our
Once your function is uploaded, you can test it and call it in a CSML flow. !
Deploy your chatbot
Once your chatbot is ready to chat with your users, you can select the channel you want to connect on. For example, using the you can connect your bots to Slack, Messenger, Whatsapp and other channels, or use the to receive requests.
Some of the Chatbot Templates available in CSML Studio
Create Your First Bot
Introduction
In this tutorial, you will learn how to setup a chatbot that will qualify leads and sign them up to your Mailchimp contact list.
At the end of this tutorial, here is what you will be able to:
Get information from the end-user
Subscribe this user to an existing Mailchimp contact list
Ask users for feedback on their experience, and send a custom answer based on their response
Writing your CSML flow
A CSML flow always starts in the start step, in this step, we introduce the chatbot.
Note that Typing(2000) needs to be preceded by the say keyword, this will show the three little jumping dots on the screen, suggesting the chatbot is typing, this action will last 2 seconds (2000 milliseconds).
We can then move on to the next step in which we will start asking for user informations.
Asking questions and remembering answers
With CSML, in order to wait for the user to reply to a question (or anything else for that matter), we use the keyword hold, the chatbot then waits for the user to reply. After answering, the user input will be placed in the event variable.
Note: the event variable is scoped to the current step, which basically means that event will be wiped off the memory once the chatbot goes out of the current step.
In order to remember what the user said, we can ask the chat to remember nlFirstname = event, and nlFirstname will then be accessible anywhere, anytime.
Let's move to the next step : lastname
First let's have a look at the Button(...) component: it has two parameters, a title="" that represents what will be displayed inside the button, and an accept=[] parameter that is a list of all the words that correspond to this button. This way, if a user types "NA", CSML will understand it as being the same as a click on this button. Lastly, we set this button as variable btnLastname.
Now that our button is saved, we then create a Question component, add the preset button and hold.
As the user answers, we check if the input matches the button or what it accepts ans remember the appropriate nlLastname.
The same goes with the email, only this time we're checking if the user input contains a @, if it doesn't we start the step again, otherwise we remember the email and move on to save everything.
Sending data to Mailchimp
Thanks to our apps directory, you can install the Mailchimp app in a few clicks (you'll just need to get your API Region, API key and contact list ID). The app needs an option parameter that encloses all the informations that Mailchimp needs.
Note that App(...) needs to be used in a do statement.
Now it's time to get some feedback from the user!
NLP coming into play
We want to use the to find out if the user's input is positive, neutral or negative. The API returns this as sentiments. If you want to see the full response from the API, you can print it using say "{{sapcaiResponse}}"
That's it !
You've done it, you've created your first CSML bot from scratch ! Here is the full code:
If you have any question, please come ask us on !
CSML Integrations
are a great way to extend the capabilities of your CSML chatbot by integrating other products with your bot without writing any additional code. CSML Studio provides a number of ready-to-user integrations (over 50 and growing!), that make it possible to integrate your chatbot with the most popular services and applications on the market.
CSML Studio integrations are ready to use. To configure an integration, you only need to configure the required credentials for this app (but some don't require any authentication!). The app's description will have the information on how to get setup.
Example: Giphy app
WhatsApp
Whatsapp is one of the most used messaging platforms in the world, replacing SMS in many cases. Setting up a Whatsapp channel is slightly more complex than some other channels but it can be a great way to get in touch with your audience!
Telegram
Amazon Alexa
Amazon Alexa is one of the main platforms for launching Voice Bots. Using CSML Studio, you can easily deploy powerful Alexa Skills on any Alexa-activated device in the world. Let's try and walk you through your journey as a CSML Voice Bot developer!
Messenger (legacy)
Due to new limitations by Meta, it is currently impossible to add a new Messenger channel from CSML Studio.
Messenger is one of the most popular chat platforms, with over 1.3B users worldwide. It is also one of the platforms that democratized the use of chatbots. It has a pretty broad set of APIs and allows for some very rich message templates, which gives it a nice user experience. If you are looking to build a publicly-accessible chatbot, Messenger is definitely a solution to look at!
Assistant
To make it really easy to publish your chatbot, CSML studio provides a full-featured web-based Conversational Assistant that you can easily integrate into any existing project. This is the simplest way to deploy your chatbot at scale!
Slack
CSML Studio supports Slack as one of its channels. Slack is a very popular option at startups and schools, and is widely used as a "ChatOps" solution by tech teams.
Google Assistant
Microsoft Teams
Microsoft Teams is a popular channel for enterprise and team use. It allows a diversity of rich messages (images, buttons, carousels...) and is widely used in many of companies worldwide. Chatbots for Microsoft Teams benefit from a rich user experience, although setting up a bot for Microsoft Teams is a slightly complex task.
Webapp (legacy)
To make it really easy to publish your chatbot, CSML studio provides a full-featured webapp so that you can easily integrate your chatbot into any existing project. This is the simplest way to deploy your chatbot at scale!
Callbots (with Twilio)
Create the perfect Callbot with CSML Studio and Twilio Voice!
SMS (with Twilio)
Instagram (legacy)
Due to new limitations by Meta, it is currently impossible to add a new Instagram channel from CSML Studio.
start:
say Typing(2000)
say "Hi 🤓, I just need a few informations in order to add you to my mailing list."
goto firstname
firstname:
say Typing(2000)
say "What's your firstname?"
hold
remember nlFirstname = event
goto lastname
lastname:
say Typing(2000)
do btnLastname = Button(
title = "I don't want to share my lastname",
accept = ["No", "No", "no", "NA", "N/A", "na", "n/a"]
)
say Question(title="What's your lastname?", buttons=[btnLastname])
hold
if (event.match(btnLastname)) remember nlLastname = "N/A"
else remember nlLastname = event
goto email
email:
say Typing(2000)
say "What's your email address?"
hold
// does the user's input look like an email address?
if (event.is_email()) {
remember nlEmail = event
goto save
}
// otherwise the input is probably not a valid email address
// we need to ask them again
say "That's not a valid email address 😱"
goto email
save:
// prepare the arguments required by the mailchimp app
do options = {
"listId": "d8acdcc85f",
"email": nlEmail,
"firstname": nlFirstname,
"lastname": nlLastname,
}
// execute the app
do mailchimpResponse = App("mailchimp", action="subscribeToList", options=options)
say Typing(2000)
say "I have added you to our newsletter subscription list !"
goto feedback
feedback:
say "How did you like this newsletter onboarding?"
hold
// query the NLP service
do sapcaiResponse = App("sap/cai", text=event)
// this contains the sentiment analysis of the query
say sapcaiResponse.results.sentiment
if (Find("positive", in=sapcaiResponse.results.sentiment)) {
say "Thank you so much for your kind words 😇."
}
else if (Find("negative", in=sapcaiResponse.results.sentiment)) {
say "I'd love to know what went wrong, please join our slack channel and let us know."
}
else {
say "I am sure you'll get to love CSML :D"
}
goto end
start:
say Typing(2000)
say "Hi 🤓, I just need a few informations in order to add you to my mailing list."
goto firstname
firstname:
say Typing(2000)
say "What's your firstname?"
hold
remember nlFirstname = event
goto lastname
lastname:
say Typing(2000)
do btnLastname = Button(
title = "I don't want to share my lastname",
accept = ["No", "No", "no", "NA", "N/A", "na", "n/a"]
)
say Question(title="What's your lastname?", buttons=[btnLastname])
hold
if (event.match(btnLastname)) remember nlLastname = "N/A"
else remember nlLastname = event
goto email
email:
say Typing(2000)
say "What's your email address?"
hold
// does the user's input look like an email address?
if (event.is_email() {
remember nlEmail = event
goto save
}
// otherwise the input is probably not a valid email address
// we need to ask them again
say "That's not a valid email address 😱"
goto email
feedback:
say "How did you like this newsletter onboarding?"
hold
// query the NLP service
do sapcaiResponse = App("sap/cai", text=event)
// this contains the sentiment analysis of the query
say sapcaiResponse.results.sentiment
if (Find("positive", in=sapcaiResponse.results.sentiment)) {
say "Thank you so much for your kind words 😇."
}
else if (Find("negative", in=sapcaiResponse.results.sentiment)) {
say "I'd love to know what went wrong, please join our slack channel and let us know."
}
else {
say "I am sure you'll get to love CSML :D"
}
goto end
save:
// prepare the arguments required by the mailchimp app
do options = {
"listId": "d8acdcc85f",
"email": nlEmail,
"firstname": nlFirstname,
"lastname": nlLastname,
}
// execute the app
do mailchimpResponse = App("mailchimp", action="subscribeToList", options=options)
say Typing(2000)
say "I have added you to our newsletter subscription list !"
goto feedback
For instance, if you are looking to add some fun Gifs to your bot, you can try our Giphy integration. To get started, go to Apps > Available Integrations > Giphy.
Simply click on Install, and you are done! Some apps require credentials or API keys, but this one does not. If that's the case you are prompted to add environment variables upon installation.
Then, to use the app in your code, you can use it like this:
The above code will generate a nice gif automatically!
generate QR codes, format documents, upload images...
and many more!
There are 2 ways you can augment your CSML chatbot by connecting it to other services: authoring your own custom apps, or installing ready-to-use CSML Integrations.
Chatwoot
Chatwoot is an open-source livechat platform, with an online SaaS version as well as a self-hosted version. If you are looking for a livechat solution that you can have full control over, or with a free plan if you want the SaaS version, we recommend Chatwoot!
To get started, go to your bot's Settings > Livechat then select Chatwoot as your livechat support platform.
You will need to retrieve:
the URL of your Chatwoot instance. If you are using chatwoot.com, it will be https://app.chatwoot.com
your access token (which you can find at the bottom of your profile settings) and
Hit Save, and a dedicated inbox will be created for you!
Canned Responses
We recommend you configure a "Signing off" canned response in Chatwoot to trigger the LIVECHAT_SESSION_END event under Settings > Canned Responses.
You can simply copy and paste the text below, or adjust to your liking - just make sure that the LIVECHAT_SESSION_END is at the end of the content.
Getting Started
In CSML Studio, every channel generates a set of API keys that you can use to perform various operations, such as managing the bot, sending broadcasts, getting information about current conversations... Channels are external connectors to your bot.
Every channel has different capabilities but all channels rely on the same API methods.
Endpoints
All calls are to be made to https://clients.csml.dev.
The API is versioned, and all calls must be prefixed by their version number. The most recent version is v1. The API is reachable on route prefix /api.
Hence, the complete endpoint for the API is https://clients.csml.dev/v1/api.
Throttling
To ensure the stability of downstream systems, API requests are throttled. Each client (a set of API key/secret) can only send up to 50 reqs/sec. Over this limit, an error code is returned and the request will not be treated.
Webhook
On the API channel exclusively, you can also register a webhook, which will be called with a POST request every time a message is sent by the bot to the end user. This is a good way to handle the outgoing messages in real time! The body of the webhook call is documented .
Your webhook has to respond within 5 seconds with a success code. Calls will not be retried in case of error.
Uninstallation
To uninstall a Workplace Chat channel, you need to delete the channel both on Workplace, and on CSML Studio. Only removing the channel on CSML Studio will leave the chatbot visible to Workplace users.
Click on Uninstall then confirm. Your bot will immediately be removed from Workplace chat, however users that already talked to the bot will still be able to find their conversation history.
After this is done, you can safely remove the channel from CSML Studio as well.
Installation
To create a CSML Studio Assistant, click on the channels menu then on create new channel.
Click on Assistant, add a name and a description (you can change it later), then click on Submit.
Your Assistant is now created and ready to use! There are two ways to use your Assistant: either by visiting the link at the top, or by adding the widget link for integrating it into your existing website. It works on mobile too!
Features
Components
Most components are available on Telegram, however Carousel components are currently not supported. Typing components are also displayed as simple Wait components.
Broadcast
You can send a broadcast to a given user by using _metadata.id as their user_id with the broadcast API or the broadcast interface in the corresponding tab in the channel's settings. It requires that the user has already interacted with the chatbot before (you can not simply send a message to a user's @username).
You can add custom metadata as well!
Livechat
Chatbots are great, but sometimes your users will need some extra human help to go beyond what the chatbot can do. With CSML Studio, you can decide to bypass CSML and get your users to talk to a human agent instead! This is especially useful if the user needs help beyond what the chatbot can propose.
In order to get your users to talk to your human agents over livechat, you will need:
a CSML chatbot and channel setup
Broadcasts API
A broadcast is a message sent proactively from the bot to a user, without the user sending a request first. It is a great way to reengage your users, for example to remind them about a conversation they didn't finish, or let them know a product they ordered has been shipped.
Broadcasts are only available on the PRO plan. More information on the CSML Studio plans:
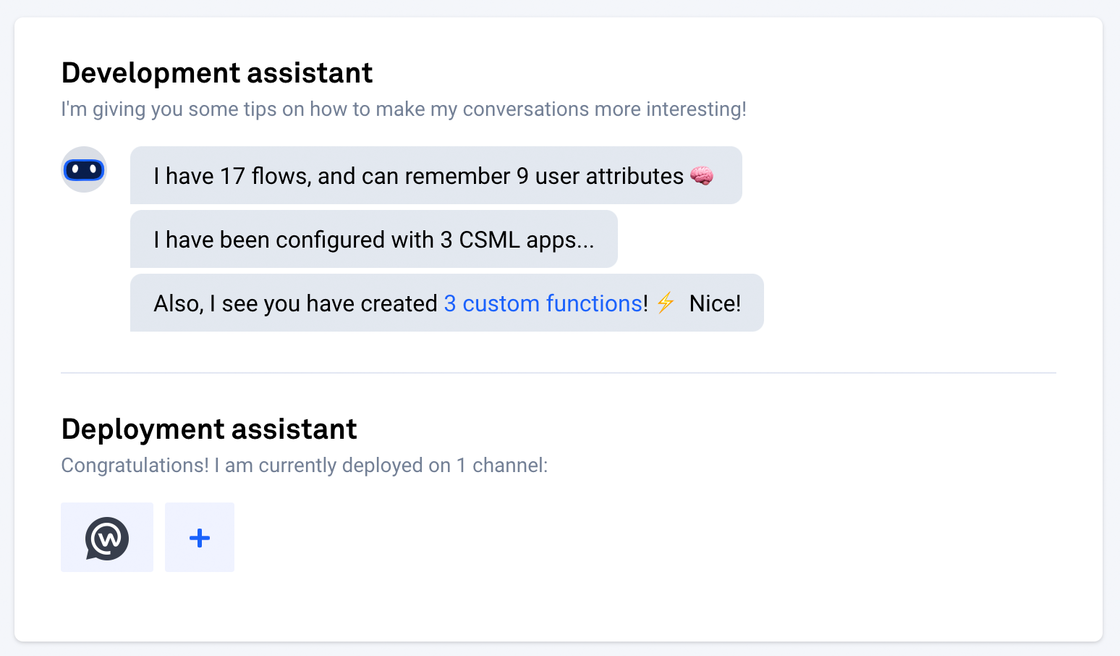
The Dashboard
Every time you login to visit your chatbot, you will be greeted by your chatbot's Dashboard. It gives you a birds-eye view over how you are doing with your chatbot so far, and provides you with some hints on how you can improve your chatbot.
Here is what it looks like:
You will find 2 different panels: the Assistant and the Checklist. Let's see what each panel does!
Features and message formats
Workplace Chat is very, very similar to Messenger (except that it's grey). Please refer to Messenger's CSML documentation:
Broadcasts
Broadcasts can be sent without any limitation to any of your Workplace Chat users, with either their valid Workplace email address or ID as the user_id.
AI Rules
In the AI Rules section of CSML Studio, you will find a way to configure flow commands for any of your flows. This section makes it easy to see in one single screen all the rules that govern the triggering of any of your flows!
Commands are words or sentences (or intents, when NLU is configured) that will trigger a given flow. For example, in the example below, if a user says "Hi", no matter where they are in the bot, they will be redirected to the Welcome flow:
You can have as many AI Rules as you want on as many flows as you want. The commands are case-insensitive, so for example "Hi", "hi", "HI"
Studio CLI
CSML Studio comes with a CLI (command-line interface) tool that helps you develop your chatbot locally before deploying it. With the , you can update your flows using your favorite code editor on your local machine and publish it on CSML Studio. For larger projects, we recommend using the CSML Studio CLI over the online interface as it makes it easier to manage many flows.
Setting up CSML Studio CLI
To setup CSML Studio CLI, simply install the tool with npm install -g @csml/studio-cli (requires nodejs 12+). Then, using your bot's API keys (see the section to learn more about creating API keys), you can now run
Configuration
You can find similar configuration settings between and Workchat channels. However, Workchat being a professional, internal-only communication channel, there are some additional options you can play with.
Broadcast
The Broadcast feature allows you to trigger any flow for any given user or list of users. To use the broadcast feature, click on Send broadcast to open a configuration popup.
Installation
How to setup a Workplace Chat channel in CSML Studio
Installing a Workchat bot on CSML Studio is very easy, as it only takes one click. However, it does require admin rights on your Workplace instance.
Go to Channels > Connect a new Channel > Workplace Chat.
If you are a Workplace admin, simply click on the button and follow the instructions. Otherwise, copy the URL just below and send it to a Workplace admin. They will be able to complete the installation flow autonomously, even if they do not have a CSML Studio account. After clicking on the button or link, you will be redirected to the app setup page on Workplace.
From there, you can configure its name, description and logo by clicking on
Features
Broadcast API
The Microsoft Teams channel supports the .
The client user_id must be set to a valid conversationId (as returned in every conversation's metadata).
Conversations API
With the Conversations API, you can manage your client's conversation statuses
POST /conversations/open
Find out whether a user currently has an open conversation on the current channel.
Bot Configuration Options
CSML Studio offers a number of other bot configuration options. Let's do a quick tour!
Bot-Wide Environment Variables
When you need to access some static values across all your users and all your flows, you should use Bot Environment Variables.
These values are injected in your conversations under the _env global variable and are accessible everywhere, without ever being injected in the current user's memory. They are also encrypted for enhanced security.
Features and Limitations
Components
As you can expect, not all CSML components work well with a SMS chatbot, as there is no support for any visual component or buttons. However you can use all of the following standard components:
Text
Workplace Chat
The Workplace Chat channel offers more or less the same features and limitations as the channel, as they are built on top of the same platform. However, there are some key differences, in how they are installed, configured and what specific features and limitations they offer.
CSML is available as a free .
Configuration
Ice Breakers
Ice Breakers provide a way for users to start a conversation with a business with a list of frequently asked questions. A maximum of 4 questions can be set. This feature is not available on Desktop!
To setup Instagram Ice Breakers, simply update the corresponding field in the channel's configuration page:
Send a broadcast on the requested channel (supported channels only) to the requested client. Broadcast requests are queued and usually sent within a few seconds. If a target is unavailable, no error is generated.
This command will setup a local development environment where you will be able to manage your chatbot entirely from the comfort of your machine!
Broadcasting with CSML Studio CLI
Broadcasting to a large number of targets can be done really easily with the CSML Studio CLI tool. Indeed, you simply need to prepare a file with all your targets:
Then, simply run the following command, which will send each of these targets a broadcast (message initiated from the bot) on the configured channel (based on the given API keys):
Question (buttons will be added in a new line under the question's title)
Image
Other components will be automatically reduced to simple text components.
Metadata
Each call made to CSML Studio will have a number of metadata, based on what information is provided by Twilio. An example _metadata object would look like this:
Using livechat in your flows is very easy. You can find an example implementation to import in CSML Studio here on github.
To start a livechat session, the user needs to specifically request a livechat session with an available agent. This is achieved by getting the user to send the payload LIVECHAT_SESSION_START. When this happens, your CSML chatbot stops receiving events, and all messages are sent to the livechat backend of your choice.
To end a session, the user must send the payload LIVECHAT_SESSION_END . To do this, we recommend that your agent sends a "signing off" message containing that payload, which will be automatically transformed into an adequate button.
The session will also expire if no message is exchanged between the agent and the user within 60 minutes by default (or the timeout configured in the livechat settings panel). When that happens, an event is sent to your bot with the payload LIVECHAT_SESSION_EXPIRED.
This example flow explains in detail the lifecycle of a livechat request:
Configuring Livechat
We have several livechat solution providers, we encourage to try them all to see what fits your use case best! There is usually a free version available to try their product.
Once you have configured the livechat integration, you can also set other parameters:
Livechat session timeout: this is the maximum amount of time a livechat session will remain active if no message is exchanged between the agent and the user. Any message sent from either side will reset that window. Default: 1hr.
Session end message and button label: to end a session, the agent should send the user a "LIVECHAT_SESSION_END" event, which will be transposed to a text and button for the user to click on, to confirm they do want to end the livechat session. If the user does not click the button or says anything else, the session continues. This field helps you configure that message.
Assistant panel
Assistant panel
The Assistant, taking the form of a simple chatbot, will help you quickly identify the current status of your chatbot and give you hints into what you could improve to make an even better chatbot. There are 2 sections, corresponding to the 2 major phases of preparing a chatbot for production: development, and deployment.
The Development assistant will lead you to add more flows to your bot, remember more information about your end users and add more capabilities with the help of integrations and custom apps.
The Deployment assistant will help you add your chatbot to a communication channel or manage your existing channels.
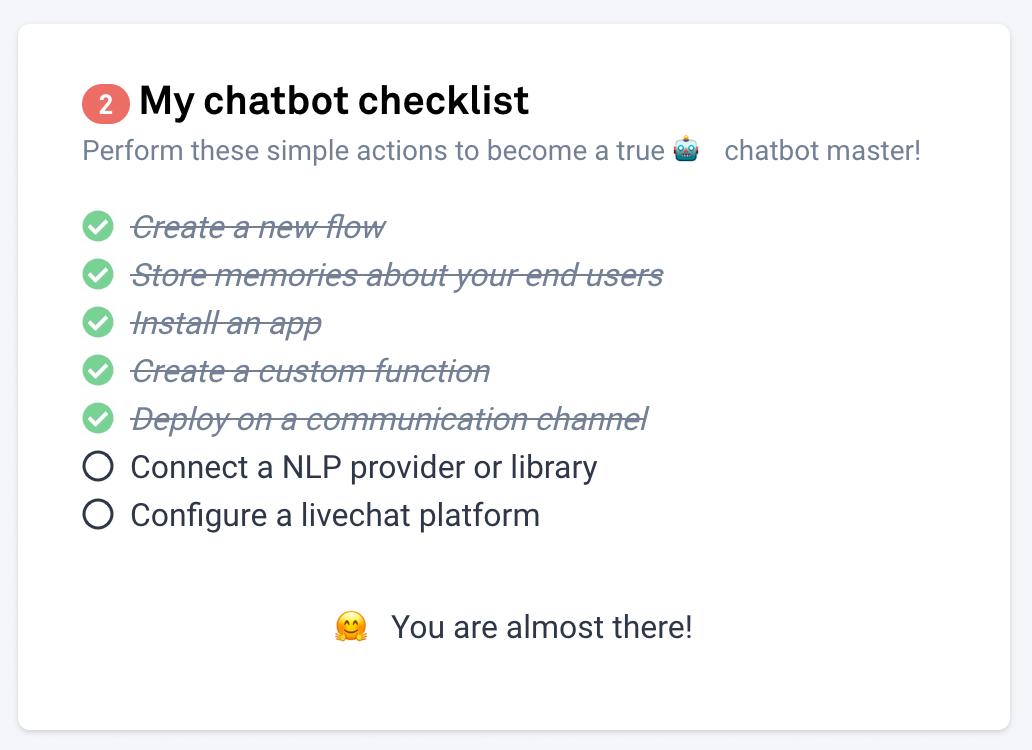
Checklist panel
Checklist panel
The checklist will help you quickly identify areas where you can improve your chatbot. It tells you what is missing to make your chatbot as complete as possible in the form of a simple to-do list of what most good chatbots should be doing.
Make sure every item of the checklist is ticked, and you will be on your path to a great chatbot!
Activity panel
Another section that's very important is the Activity page.
This page, as the name indicates, gives you a high-level overview over your chatbot's activity in the past 3 months. If you are seeing a steady increase in usage, then you are probably doing things right. However, if your numbers are stalling or decreasing, perhaps you can take some action like sending a broadcast or adding new content?
The activity panel's content is updated every night, so if you juste created and deployed your chatbot, you will not see any data. Come back on the next day to see your progress!
We trust that you will find The Dashboard quite instructive in your path to create the greatest possible chatbot!
and
"hI"
will all trigger the
Welcome
flow. Also, if the same rule is used as an input to two different flows, the triggered flow will be randomly chosen among the target flows.
This feature can also be used in conjunction with any Preprocessing or NLP configured in your bot. For instance, if after going through a NLP service, an intent is detected, the intent name can be used as a command for any given flow (with the intent: prefix, i.e intent:myIntentName). For instance, this is how an intent called DemoContext would be handled with AI Rules:
Under Flow, select the flow you want to trigger
Under Targets, list the emails (one per line) you want to receive the broadcast
Under Context, you can optionally add any additional context that you want to set in the _metadata object for this broadcast
Once you hit Send, the broadcast will be sent immediately.
For a very large number of targets, consider splitting into smaller sets.
If the broadcast were to fail sending for any reason, you would not want to retry all the users again, as some may receive the broadcast twice!
You can also set which groups will have access to the bot.
If you want everyone to have access to this chatbot, leave the All groups box checked.
If you want to restrict access to the members of specific groups, check Specific groups instead, then select which groups are allowed to access the bot. Users that are not in one of the selected groups will not be able to search for or chat with the bot in Workchat.
Click on Add to Workplace and you are done!
This is a perfect use case for API keys or secrets, as well as global configuration options.
Self-Hosted CSML Engine
If you have strong requirements for data hosting or prefer hosting the CSML Engine on your own servers, you may want to use the On-Premise feature. By using this feature, you have full control over what version of CSML Engine is used at any given time (the Studio will always default to the latest available version otherwise), but you also have the responsibility of maintaining and scaling the engine according to your usage. We recommend that you only use this option if you really know what you are doing or if you have strong legal (i.e data privacy, compliance) requirements for doing so.
Each Ice Breaker must consist of a question and a payload. To remove all Ice Breakers, simply set this field to an empty array []!
Let us know if we can do anything else for you - we are here to help.
LIVECHAT_SESSION_END
Installation
Creating a Telegram chatbot is particularly easy. You only need to get a regular Telegram account, then to interact with @BotFatheron Telegram, which is a built-in bot that will help you setup your own bot!
Telegram's @BotFather
Very important: make sure that you never EVER show the bot's token to anybody! Otherwise anyone will be able to take control of your chatbot instantly.
BotFather lets you customize your bot even more. You can use the following commands:
/setname to change the bot's name
/setuserpic to change the bot's profile picture
/setdescription
This is also a perfect way to try the Telegram commands feature, which is very powerful!
CSML Studio Setup
Once you have received the bot's token, go to your bot's Channels page and click on Telegram to create a new Telegram chatbot.
Once this is done, you will be able to setup a few commands for your own bot. The /start command is mandatory and can not be removed (but you can change its description), and it will always trigger the chatbot's welcome flow. You can add more commands to your bot, which will show if you start typing / or click on the corresponding symbol in the Telegram interface:
If you have flows matching the names of the commands, these flows will be triggered automatically. Otherwise, you can set custom rules in the to match the given commands (including the leading /)
Installation
Step by step guide to install a Slack channel
The Slack integration provides you with a Manifest that allows you to setup most of the heavy Slack App configuration in seconds. To get started, simply click on the link provided here:
Simply follow the on-screen instructions until the app is installed to your workspace. You will be required to allow the app to perform the necessary actions - you must be a workspace admin to do that.
You will still need to perform a few actions to correctly setup your app. First, visit the App Manifest menu. It may have an orange warning box at the top: in that case, click the "Click here to verify" link to make that warning disappear. Another way to perform this verification if needed is by visiting Event Subscriptions and performing the same operation.
Next, visit the OAuth & Permissions menu, copy the Bot User Token and save it for later.
Next, select App Home in the left-side menu. Enter a Display Name and a Default Name for your bot and select Always Show My Bot as Online.
At the bottom of the same App Home page, under Show Tabs, make sure the Messages Tab toggle is on and the Allow users to send Slash commands and messages from the messages tab checkbox is checked.
Next, visit Basic Information from the left-side menu, copy the App ID, Client ID, Client Secret and Signing Secret under App Credentials and save them for later.
On the same page, you can also customize the appearance of your chatbot in Slack (image, colors...).
Finally, back in CSML Studio, paste the credentials you retrieved earlier: Bot User Token, App ID, Client ID, Client Secret, Signing Secret, then click on Submit.
You should now be able to see your app in the left sidebar of your Slack workspace, under Apps. This is where you can chat with your slack bot!
Configuring a NLU Provider
Using SaaS providers
CSML Studio currently supports the following NLP providers:
Please refer to each provider's documentation for more information on how to generate credentials. CSML Studio supports the most common and secure way of connecting to these providers.
If your favorite provider is not in this list, please reach out to .
Using the Custom Webhook integration
You can also add a custom NLP engine by using the custom Webhook integration. This is especially useful if we don't currently support your NLP provider of choice or if you are running your NLP services on premise.
To use the Webhook integration, simply provide a URL that we can send a POST request to, with the following body:
The URL may contain query parameters, for example with an API Key for authentication purposes.
When called, this endpoint must return the response in the following form:
You can test this endpoint directly on the configuration page.
Installation
Setup a Google Chat service account
Service accounts are the primary way to interact with Google Cloud resources, and setting up a chatbot is no different.
Then, to enable the Google Chat API for this project:
Then, go to Identity > Service Accounts in the menu (or visit ) and create a service account for the project.
In the next screen, grant the Project > Editor role to the service account:
The third step (Grant users access to this service account) is optional and can be skipped. Click on Done to create the service account.
Once the service account is created, you will need to generate a key. Select the service account, click on Add Key > Create New Key, select JSON as the Key type, and save the file.
Setup the channel in CSML Studio
In CSML Studio, under Channels > Connect a new channel, select the Google Chat channel. In the next screen, give your channel a name, a description and upload your service account credentials.
In the next screen, you can configure the bot's Welcome Flow, and copy the Chatbot Endpoint URL, which we will use in the next step.
Connect the chatbot with Google Chat
To finalize the configuration, visit (make sure that the selected project is still the same one as before) and fill the information as requested.
You can select Bot works in direct messages or Bot works in rooms... depending on the experience you want to give to users.
Under Bot URL, paste the Chatbot Endpoint URL from the previous step.
Click Save, and you are all set!
Finding the bot in Google Chat
To find your bot in Google Chat, users have to navigate to the Bot catalog, which can be reached either by clicking the + icon next to the bot section of the left sidebar, or by searching for the name of the bot directly:
Upon activating the bot for the first time, the Welcome Message will be displayed:
Features and Limitations
Features
Available components
Whatsapp supports the following components:
Simple texts
Wait() and Typing()
Medias: Image(), Video(), Audio(), File()
Markdown is partially supported (only bold, italic and strikethrough).
QR Codes Messages
Whatsapp provides an easy way to generate QR codes that let users reach your chatbot easily. You can read more about it here:
Limitations
Channel Availability
As a security measure, user access tokens expire after about 60 days. If your Whatsapp chatbot remains unused for a longer time, the token will be automatically expired and you will need to reconnect your app to restore it.
Buttons
Whatsapp has a very limited set of interactive components. Buttons for example are textual only, and your users will have to type the actual text of the button
The mapping of Question() and Button() components to text is performed automatically. However you need to set the right title and accepts values in order to correctly match the user's input.
The title of a button must be between 1-20 characters long. You can however manually set a longer payload if needed:
say Button("Click here!", payload="MY_BUTTON_CLICK_HERE_PAYLOAD")
Urls
The Url() component does not support any alternative text or title. Only the given url will be shown as is.
For instance, the following code:
Has the following output:
Video
You must upload videos in mp4 format. Videos hosted on platforms such as Youtube, Dailymotion or Vimeo will not display (use the Url() component).
Audio
You must upload audio files in mp3 format. Audio files hosted on platforms such as Spotify, Deezer or Soundcloud will not display (use the Url() component).
Files
There is a hard limit of 25MB for all uploaded files (including image, video and audio files).
In a File() component, not all file types are supported. A list of supported file types could not be found, but it is safe to recommend using very common file types only.
The file upload process happens asynchronously on Whatsapp, so messages might show out of order if there is a large upload with not enough time left for its upload before sending the next message.
Carousel, Card
Carousel() and Card() components are not supported.
Configuration
The Messenger channel on CSML Studio offers some configuration options. More will be added over time!
Welcome Flow
When a user starts using your bot, the first thing they will see is a Get Started button (the text will be automatically translated in their own configured language and can not be changed). In the background, a "GET_STARTED" payload is sent to the bot.
This setting helps you configure which flow will be triggered by this specific payload. By default it will be the bot's default flow, but you might want to have a different behavior for what happens when users connect to your bot for the very first time (or when they have deleted the conversation before and want to start anew).
To configure a welcome flow, simply select it in the dropdown list the flow you want to run when the user clicks on the Get Started button.
Referral Parameters
You can use to directly send users to various sections of your chatbot instead of the standard Welcome Flow. There are two scenarios:
If the user has never used your bot before (or has deleted their conversation), they will be shown the default Get Started button but when they click on it, they will reach the target flow instead of the welcome flow
If the user has already used the bot, they will directly go to the defined flow, in place of where they were before.
If a user uses a link with a Ref parameter that is not configured properly, the regular behaviour will persist (the Get Started button will redirect to the welcome flow, and existing conversations will simply continue).
There are two ways to use Ref parameters to redirect to flows. You can either configure them in the channel's settings page by adding connections between custom Ref parameters and a target flow:
Or you can use the following special syntax:
The main advantage of the second syntax is that you can generate the links on the go; however, the first method is more flexible as you can easily change where a link is redirected even after it is created, and the content of the Ref parameter is entirely customizable.
Persistent Menu
Messenger makes it possible to add a to your bots.
We offer a simple way to set precisely the persistent menu you want, by letting you add a JSON-formatted payload to set as the bot's persistent menu. Any valid persistent menu configuration is accepted.
Metadata
This is not really a configuration option, but know that the _metadata object inside your flows will contain some info about your user: their name, first_name, and last_name will be accessible in the conversation's metadata, unless they are not correctly set in their profile.
There is also an id field, however this is not the user's real ID but is called an . It can not be related back to the user's actual Facebook ID.
Installation
1. Creating the Google Actions project
Google Assistant chatbots are instances of Google Actions. To get started, visit https://console.actions.google.com and create a new project:
In the next screens, select Custom then Blank Project, and click on Start building.
In the next screen, you will be able to create a display name, which is also the default invocation for your action. Read more about how to !
Finally, you will also need to retrieve your action project's ID, which you can easily copy from the URL:
2. Connecting the Channel in CSML Studio
In CSML Studio, create a new Google Assistant channel from the Channels page and fill in the requested fields. The name and description can differ from the name of the Action, they are only visible inside CSML Studio!
After you created the channel, download and install the gactions CLI utility from this page: . This tool will let you "bind" your gactions and the CSML studio project, using the gactions.json package that you can download on the channel's configuration page:
You will need to execute the command on a terminal and follow the instructions to authenticate your requests with Google. Concretely, after you execute the command, you will need to click on the link that the command will prompt you to visit, login with your Google account, and copy and paste the given code:
After you have done this process, you can go test the bot in the Test panel:
Installation
To create a webapp channel, click on the channels menu then on create new channel.
Click on Webapp, add a name and a description (you can change it later), then click on Submit.
After a few seconds, your webapp is created and ready to use!
There are two ways to use a webapp: either by visiting the link at the top, or by adding the embed link for integrating it into your existing website. It works on mobile too!
Features
Instagram Chatbots are quite similar to Messenger Chatbots, but there are quite a few differences. Here is everything you can do with Instagram Chatbots!
Note that the Typing component is converted to a simpler Wait component, and Carousel components are entirely unavailable.
Also, all types of Buttons do not display at all on the web version of Instagram (but a vast majority of Instagram users are on the mobile app).
Broadcast
Instagram supports , with the same limitations as with Messenger. Please refer to the for more information!
Failing to respect this rule may get your chatbot and/or page banned from Facebook or Instagram!
Limitations
In general, all Instagram limitations apply. For example, texts can not be larger than 2000 UTF-8 characters, and attachment sizes (Videos, Audio, Files) can not be larger than 25MB.
Regular buttons are limited to 13 per component. The length of the button title should also never be longer than 20 characters.
You can also refer to the for relevant information on other Facebook limitations.
Event Metadata
A sample _metadata for an incoming event will be similar to the following object:
Installation
How to setup a Facebook Messenger channel in CSML Studio
There are several prerequisites to building a Messenger chatbot, which we will assume are already taken care of. Before we start, please make sure that you already have:
an active Facebook account
a Facebook page for your chatbot to be associated with that you are an admin of
a CSML chatbot ready to go
1. Login with facebook
In CSML Studio, visit Channels > Connect new channel > Messenger. Click on Continue with Facebook to grant permissions to CSML Studio to connect bots to your chosen pages. This starts a standard Facebook login flow:
After this, simply select the page you want to link to the bot, and wait a few seconds.
Voilà! You can now search for your chatbot in Facebook Messenger (it will be listed under the page's name).
Authentication
Authentication
All API calls are authenticated with the combination of two separate keys: API Key and API Secret.
The API Key is the public key and can be put in clear client-side (your website, your app...). The API Secret should never be shared publicly and should only be set on your server.
There are two different modes of authentication for Studio endpoints:
Preprocessing
CSML Studio also offers a way to preprocess every incoming event of certain types, in order to add some metadata or transform it. Here are some use cases:
transcribe audio inputs
translate incoming text
Introduction
Using the CSML Studio, you can connect and deploy your chatbot on a number of communication channels. Each channel has its own set of limitations and features, so when developing a chatbot you must always keep in mind how your end users will be using your chatbot. Vocal chatbots are not consumed the same way as textual chatbot, so it sometimes makes sense to design an entirely separate user experience for channel.
Default component behavior
CSML can not compensate for limitations in each third-party channel. Instead, it provides a universal way to describe conversational components and an adaptor will try to match with what is available on that channel.
Installation
Instagram Setup
Instagram Business Account
Installation
How to configure an Amazon Alexa skill with CSML Studio
Step 1: Initial setup in the Alexa Console
To create an Amazon Alexa skill, you will first need to create a free developer account on , then visit the and click on Create Skill.
In the next section, give your skill a name and select the default language. This can be changed later! Under Choose a model to add to your skill, select
Installation
Prerequisites
There are two prerequisites for installing a Whatsapp bot in the CSML Studio.
you MUST have a verified Meta Business account
Customization
Injecting Conversation Metadata
By default, the webapp channel does not include any specific context about the conversation (see the _metadata object ). In some cases, it can be useful to load the webapp (or chatbox) with pre-existing metadata.
Some common scenarios:
Installation
How to configure a callbot on CSML Studio with Twilio Voice
Setup Twilio
Step 1: Purchase a Twilio phone number compatible with Programmable Voice
Public Endpoints (consisting of Chat and Broadcasts API endpoints) can be authentified by providing only the value of the Api Key in the X-Api-Key header. They can be accessed from the frontend, i.e by creating your own chat interface integrated in your app or website.
Implementation examples
When calling Chat and Broadcasts API endpoints, you only need to set the X-Api-Key header as follows:
Private Endpoints Authentication
Private Endpoints are endpoints that should only be accessible to the developer of the chabot, allowing to modify the chatbot in its entirety or access conversation data (Bot and Conversations API endpoints). To authentify your Private Endpoints requests you need to set the X-Api-Key and X-Api-Signature headers. The CSML Studio Private APIs use HMAC authentication to ensure that all calls are properly signed with both the API Key and API Secret, while preventing man-in-the-middle attacks and replay attacks
The X-Api-Signature process MUST NEVER be done on the client side, as this would let any person in control of your API Secret also control your bot (make changes, get user data...). Obviously, never share your API Secret with anyone in clear text.
In the X-Api-Key header, concatenate the API Key and the current unix timestamp (in seconds), separated by the | character.
In the X-Api-Signature header, provide the hexadecimal sha-256 hash of the X-Api-Key header value, signed with your API Secret.
The CSML server will be able to validate that both the API Key and the API Secret used are valid, without requiring you to provide the API Secret in clear text. Replay attacks are prevented by invalidating all calls a few minutes after the timestamp provided in the X-Api-Key header.
Implementation examples
To authenticate your Private calls, you need to calculate the signature based on the Api Key and the Api Secret that you can find in CSML Studio, as well as the current timestamp. Here are implementation examples of the X-Api-Key and X-Api-Signature headers in Node.js and Python.
NB: this calculation should never be performed client-side!
Then, perform an authenticated call as follows:
{
"text": "TEXT_TO_ANALYZE"
}
{
// intent can also be null if no intent is found
"intent": {
"name": "NAME_OF_INTENT",
"confidence": 0.84
},
"alternative_intents": [
// ... other matching intents
],
"entities": {
"someEntity": [
{
"value": "somevalue",
"metadata": {
// ... any additional information about entity
},
},
// ... other values for the same entity
],
// ... other entities
}
// ... any additional data: sentiment analyzis, language...
}
run a custom natural language processing library on text inputs (for that use case, you may also want to look at Natural Language Processing)
Preprocessors are simply external apps that are run on every incoming event (of the given type) and return a valid CSML event. The only specificity is that the parameters it must accept and return are standard CSML event payloads. Preprocessors that fail to accept or return such payloads are simply ignored and your incoming event will not be transformed.
How to add a CSML preprocessor
Let's create a simple Text preprocessor that will return a picture of a hot dog if the user had the word "hot dog" in their input, or change the text to "Not hot dog" otherwise.
To add a preprocessor, you first need to add a preprocessor-compatible app under the apps section (see here). For this tutorial, let's just use the Quick Mode, but of course you can use Complete Mode as well.
This is the code we are going to use:
It is really simple: if the user text input contains the words "hot dog" anywhere, then return an image of a hotdog. Otherwise, change the text to "Not hot dog". In both cases, the original, untransformed event is still accessible with event._original_event in you CSML code, if needed.
Next, go to Apps > Add Custom App and under Quick Mode, simply copy and paste it, select a name for your app (for instance, hotdog seems like a fitting name), and click save.
Then, head to the Preprocessing page. We only want to preprocess text events, but of course, we could do a similar app for other types of events.
Now, back to the CSML Editor, you can do something like the following:
In most cases, CSML will try to find a sensible default behavior for each component on each channel. For instance, some channels can not display actual buttons so they will be displayed as plain text: in that case, a good practice is to place buttons in an ordered list and accept the buttons number as a trigger for that button.
Native channel behavior
In most cases, CSML offers to send a raw object to the channel adapter. For example, whilst CSML does not (yet) cover Airline Templates for Messenger, you can always send a raw Check-In Template object if you need it:
Most channels will provide a similar way of accessing native behavior for situations where CSML Components are not sufficient.
Differentiating between channels
If you plan to use the same chatbot on multiple channels at the same time, there may be times where you need your chatbot to have a different behavior based on the type of channel: changing a text, displaying a static image instead of a video, altering the buttons...
Example whatsapp buttons list
The first thing you need is an instagram business account. Luckily, switching from personal to business account is a straightforward process: simply follow
.
Some common issues may come up and prevent you to correctly connect your chatbot to your Instagram account:
Make sure that your Instagram account has the Business type (not the Creator type). You can switch from a Creator to a Business account under Settings > Account > Switch to Business Account.
You also need to allow access to messages for the chatbot to be able to access them. Here is how.
Facebook Business Page
You will also need a Facebook page linked to your Instagram Business account. You can easily create a new page or use an existing one, and connect it to your Instagram account by following this process.
CSML Studio Setup
To connect your Instagram account to your CSML Studio chatbot, visit the Channels page, then click on Instagram to create a new Instagram channel. Then, follow the Login with Facebook flow, and make sure to select both the Instagram Business Account, and the Facebook Page it is linked with:
Also, make sure that all the requested permissions are checked:
After this flow, you will be presented with a list of your Facebook pages. Select the one that is linked to your Instagram page:
After a few seconds, you are redirected to a new page. It's done!
Then, in CSML Studio, create a new Alexa channel for your bot under Channels > Amazon Alexa and set the name and ID of your skill. You will also need to copy the HTTPS Endpoint URL to configure the Skill in the ASK console later. You can then save for now!
To finalize the configuration, in the ASK Console, visit your skill's Build tab > Endpoint. By default, AWS Lambda ARN is selected: select HTTPS instead and under Default Region, paste your HTTPS Endpoint URL from CSML Studio and select the SSL Certificate option "My development endpoint is a sub-domain of a domain that has a wildcard certificate from a certificate authority", then click on Save Endpoints.
Your skill is now correctly configured with CSML Studio!
In your bot in CSML Studio, go to Channels > Connect a new channel, then select Whatsapp.
In the next screen, enter a name and description for your channel (it is purely informational and can be changed later) and add the required credentials.
The App ID and App Secret can be found in the app's Basic Settings page:
The User Access Token,Phone Number ID (and not the actual phone number!) and WhatsApp Business Account ID can be foud under Whatsapp > Getting Started. You can start with one of the Test numbers provided by Facebook, but in production you will want to change that to your own phone number once it is properly configured.
Then, click Save to setup the channel. In the following page, you will also receive your Webhook configuration parameters:
Use these parameters in the Whatsapp > Configuration page under Callback URL and Verify token. Make sure to also subscribe to the messages Webhook field.
the bot is loaded in a website where the user is already known: in that case, we may be interested in injecting the user's context (name, email...) inside the conversation.
the user is authentified on the parent website: in that case, we may want to inject an authentication token into the user's conversation for subsequent calls.
the same bot is used across several websites and we want to know which website the user is currently visiting: in that case we can inject a unique website identifier into the conversation.
In this example, the chatbot already knows the user's email address and first name
The injected data is available in the _metadata global variable, available in every flow.
The code of the example above is:
To add custom metadata in a webapp, simply add the encoded (with javascript's encodeURIComponent function) JSON string of the metadata you want to inject to the query parameters of the webapp's URL. The URL of the webapp in the example above would be:
Customizing the UI
You can change the appearance of the webapp by visiting the Appearance tab of the webapp configuration panel. This lets you have even more control over the final experience for your end users, and match your own branding even better!
Many elements are configurable:
Chatbot avatar, header card color and background image
To get started, you will need to create a Twilio account and purchase a phone number in the country of your choice. Twilio has a documentation on this topic. The only point of attention is that you must make sure that the number you purchase has Voice capabilities. Please keep in mind that depending on your country of origin, the requirements may differ, and Twilio may ask you for business verification. Keep track of this phone number (including the country code) as you are going to need to add it later to CSML Studio!
Once you have created this app, find its Application SID by clicking on its name again on the list of TwiML apps, and keep this information for later.
You will then need to link this Application with the phone number you created earlier. To do so, visit the Phone Numbers sections of the Twilio console, and click on your number to configure it. Under Voice & Fax, select Accept incoming voice calls, configure with TwiML App and pick the TwiML App we provided earlier.
Step 3: Security and Authorization
The last step is to provide CSML Studio with means to make sure that the requests that are sent to the Twilio Voice endpoint are indeed coming from Twilio. To do so, visit your Twilio Project Settings and copy your Account SID and Auth Token, found under API Credentials:
Setup CSML Studio
To setup your Twilio Callbot in CSML Studio, you will simply need to visit the Channels section and create a new Twilio (Voice) channel. Then simply fill the required fields with the information you gathered earlier.
About the Language field: as Twilio provides Speech-To-Text and Text-To-Speech capabilities, it must know in advance in what language the user is supposed to speak. The list of all supported languages is available in Twilio's documentation. You must specify the full ISO locale code (i.e en-US, fr-FR...).
Once you click on Submit, your bot is ready to use!
Example of a website using an embedded webapp (or chatbox)
Select any page you might want to associate with the bot
Search for your chatbot in the search bar. It will appear under the Businesses section.
Authoring Custom Apps
If you already have custom code that you would like to use in your chatbot, you can import it directly as a custom app in CSML Studio and use it without any change.
In CSML Studio, apps are run by default on AWS Lambda, which ensures maximum availability, scalability and security by isolating your code in separate containers. The supported runtimes are currently:
Nodejs v10.x and 12.x
Java 8 and 11
Python 2.7, 3.6, 3.7 and 3.8
Dotnetcore 2.1 and 3.1
Go 1.x
Ruby 2.5 and 2.7
To get started with AWS Lambda compatible deployment package in any language, .
Deprecation notice: the original Fn() notation for calling Apps (formerly called Functions) in your CSML code has been replaced by the newer App() built-in as of CSML v1.5. Both notations will continue to work until CSML v2 is released, but this documentation will only reference the new App() usage from now on.
Quick Mode
The easiest way to author custom apps in CSML Studio is to use the Quick Mode, which provides you with a code editor to create your app directly in the browser. There are several limitations:
only nodejs is supported (support for python will be added shortly)
quick apps can not contain more than 4096 characters
custom modules can not be added (however all native node modules are supported)
If you need more configuration options (other languages, bigger package size, custom modules), we recommend using the Complete Mode as explained below.
As an example, let's create a simple nodejs 12.x app that will return a random user from . This code performs a simple GET request to https://randomuser.me/api and returns the first user in the returned array. The code is available : download it or clone it to get started.
The App Code
To test this program, simply run node test.js at the root of the project. You should see something like the following:
Authoring in Quick Mode
Select Add Custom App at the top-right corner of the apps page, which brings you directly to Quick Mode (nodejs). Simply copy-paste the content of index.js into the code editor, choose a name for your app, then click Save.
You can now use your app in your CSML Chatbot, like this:
Complete Mode
With complete mode, a few extra steps are needed, as you will need to provide the code in a deployment package and upload it on the platform.
Creating a deployment package
At the root of the project as downloaded from github, run the command zip -r9 ../randomuser.zip .. This will create a deployment package for your app, that you will be able to import in CSML Studio.
You MUST run this command inside the project directory. Zipping the folder itself produces an invalid deployment package.
Uploading to CSML Studio
In the sidebar, click on Apps > Add a new app. In the app creation page, upload your deployment package, give your app a distinctive and unique name such as getRandomUser, leave index.handler as your app's main handler and select nodejs12.x as the runtime.
You can leave the sections below as is for now; if your app took any argument or required any environment variable, this is where you would configure it.
Once you are done, simply save. You can now use your app in your CSML Chatbot as above.
Good practices
As in every development project, apps have a processing cost associated to them. The more difficult the task is, the longer it takes to perform, the worse your user experience will be. Keep in mind that running apps will also increase the latency between the user's input and the bot's response. If possible, try to stick to native CSML code!
It is always a good practice to only return what you intend to use. For example, if you are interfacing with a product catalog, do you need to get all 3542 items in the catalog, or will the first 5 suffice? If you are retrieving a list of items, what properties from that list do you actually need?
Apps are limited to 30s of execution time. If it takes longer, the app will stop and return an error.
Widget
The Assistant channel also comes with a configurable website plugin (called the Widget) that can be added to any website by adding a single line in your source code. The Widget will then appear as a small bubble in the bottom-right corner of your site for every visitor.
Installation
Simply add the following line of code in your source code, just before the closing </body> tag (replace it with the actual line that you can find in your Webapp configuration panel):
Once this is done, a chat bubble will appear as follows on every page where that code is included.
Adding a Custom Greeting
The Widget lets you configure a custom popup message to help you engage more actively with your customers. You can even have default greeting messages depending on the page where the widget is loaded! Here is how it works:
Greetings are matched with their page based on the URI. The first message that matches the URI is the one that will be displayed. We support wildcards * and ** to make it more versatile!
To display a message on all pages, use /** as the URI.
Optional Attributes
Several configurations are available as to maximize compatibility across browsers.
data-position
By default, the widget will be displayed on the right side of the screen. To display the widget on the left instead, simply add data-position="left".
data-metadata
To add custom metadata in a widget (), you need to add a data-metadata attribute to the widget initialization script tag that contains the encoded (with ) JSON string of the metadata you want to inject.
For example: data-metadata="%7B%22email%22%3A%22jane.doe%40company.com%22%7D"
data-logo-url
You can configure a custom image to be used as the widget logo by setting this parameter to the URL of your image. You can use a transparent png or a svg to achieve this effect below, or directly use a square image (it will be rounded automatically) without a transparent background to use as the logo.
For example: data-logo-url="https://cdn.clevy.io/clevy-logo-square-white.png"
data-launcher-fill, data-launcher-background
These two parameters let you change the fill color of the default icons, as well as the background for the launcher button.
Any valid CSS value for these elements is accepted. The default values are:
data-force-open
Force the widget to open as soon as the script is loaded. Not recommended as it might be a bit agressive for the visitors of the page, but may be useful in some cases!
data-ref
Set the Assistant's to trigger a specific flow or step.
Installation
How to setup a Microsoft Teams channel in CSML Studio
The installation process of a Microsoft Teams chatbot has many steps. You will also need to be able to create an app and bot on your Microsoft Teams and Azure tenants. Once
To get started, visit Channels > Connect new channel > Microsoft Teams (beta).
1. Create a bot on Microsoft Bot Framework
Retrieve your Messaging endpoint from the Studio configuration page:
Visit to create a new bot on Bot Framework. You may be asked to login to your developer account. On the next page, fill in a logo, name, description and bot handle for your bot, as well as the Messaging endpoint from the previous step. Leav Enable Streaming Endpoint unchecked. Take note of the bot handle for later.
Next, select Create Microsoft App ID and password.
You will be taken to a new page on Azure to register a new app (or list existing apps). Click on New registration.
On the next page, fill in a Name, select the Accounts in any organizational directory - Multitenant option (the reason is that you will be using the Microsoft Bot Framework tenant for your bot, which will require access to the app as well).
You can leave the Redirect URI fields empty, then click Register.
On the next page, create a New client secret, give it a name and a validity date (if you select anything other than Never, you will need to come back occasionally and get a new secret), submit, then take note of the given secret (you will never be able to see it again).
Now, go to Overview and take note of the App ID for later. After that, you can close this window.
Back to the Bot Framework configuration window, paste the Microsoft App ID you just created where required, then scroll to the bottom of the page, check the "I Agree" box and click Register.
2. Registering Microsoft Teams as a channel on Bot Framework
After registering your bot, you need to add Microsoft Teams as a channel. To do so, simply click on the Configure Microsoft Teams channel icon.
On the next page, simply click Save without doing anything else, check the "I Agree" box, and submit.
You can now close this window as well and go back to the CSML Studio.
3. Connect the bot to CSML Studio
Back to the CSML Studio channel creation page, fill in the App ID, App secret and Bot handle, then submit.
In the next page, you can generate and download a Manifest for your Microsoft Teams chatbot. A manifest is a configuration file that you will be able to upload on Microsoft Teams in order to deploy your chatbot to your team. It contains all the information required for Microsoft to correctly install and display your bot to every user.
Experts only: you can also use Microsoft Team's App Studio to generate a valid manifest.
Upon saving, a manifest.zip file will be downloaded to your computer. Save it somewhere for the next (and final) installation step.
4. Deploy your bot on Microsoft Teams
On Microsoft Teams (web or desktop), find the Apps panel, then select Upload custom app > Upload for MY_TEAM (obviously, replace MY_TEAM with the name of your own team).
Then, click on the App you just uploaded, then select Add.
Voilà! Your bot is now available to all users in your team:
Customization
Referral Parameter
You can launch a specific flow (and step) instead of the default Welcome Flow when loading the Assistant by providing a ref query parameter in its URL.
To force the launch of a specific flow when opening the Assistant URL, use the following special syntax:
Injecting Conversation Metadata
By default, the Assistant channel does not include any specific context about the conversation (see the _metadata object ). In some cases, it can be useful to load the Assistant (or Widget) with pre-existing metadata.
Some common scenarios:
the bot is loaded in a website where the user is already known: in that case, we may be interested in injecting the user's context (name, email...) inside the conversation.
the user is authentified on the parent website: in that case, we may want to inject an authentication token into the user's conversation for subsequent calls.
the same bot is used across several websites and we want to know which website the user is currently visiting: in that case we can inject a unique website identifier into the conversation.
The injected data is available in the _metadata global variable, available in every flow.
The code of the example above is:
To add custom metadata in your Assistant, simply add the encoded (with ) JSON string of the metadata you want to inject to the query parameters of the URL. The URL of the Assistant in the example above would be:
Customizing the UI
You can change the appearance of the Assistant by visiting the Design tab of the configuration panel. This lets you have even more control over the final experience for your end users, and match your own branding even better!
Many elements are configurable:
Chatbot avatar, header card color and background image
User bubble colors
Hiding the CSML branding
Installation
Setup Twilio
Step 1: Purchase a Twilio phone number compatible with Programmable Messaging
To get started, you will need to create a Twilio account and purchase a phone number in the country of your choice. . The only point of attention is that you must make sure that the number you purchase has Messaging capabilities. Please keep in mind that depending on your country of origin, the requirements may differ, and Twilio may ask you for business verification. Keep track of this phone number (including the country code) as you are going to need to add it later to CSML Studio!
Step 2: Configure the messaging webhook
To configure the webhook, you can either use a TwiML app, or directly set a webhook in the messaging configuration panel. Either way, you will need to set the HTTP POST webhook to , for example like so:
Step 3: Security and Authorization
The last step is to provide CSML Studio with means to make sure that the requests that are sent to the Twilio Voice endpoint are indeed coming from Twilio. To do so, and copy your Account SID and Auth Token, found under API Credentials:
Setup CSML Studio
To setup your Twilio SMS channel in CSML Studio, you will simply need to visit the Channels section and create a new Twilio SMS channel. Then simply fill the required fields with the information you gathered earlier.
Once you click on Submit, your bot is ready to use!
Configuration
General information
The settings panel has a few options to allow you to configure the Assistant. Each Assistant must have a name, and you can also add an optional description and logo.
Authenticating Users
In order to connect your users to various services, you may need to authenticate users. There are several ways to do this, depending on the authentication methods that are available in the 3rd-party service.
Using Chatbot-wide Service Accounts
CSML chatbots run in a secure server, which means that you can load credentials for the service you want to access in your chatbot's or either dynamically or statically accessing variables inside a flow. If a single set of credentials lets all your users access the service, it means that you probably created a dedicated service account, an account specifically made for the chatbot to access your service with credentials that all users will use to perform the action they want to do.
AI & Natural Language Processing
CSML Studio allows you to use your own pre-trained Natural Language Processing (NLP) service directly in your CSML chatbots with very little configuration. You can easily setup your favorite NLP provider in AI & NLU > NLU Configuration:
By default, all bots run in Strict Mode, where the input needs to exactly match one of the given rules to trigger a flow.
When a NLP provider is configured, all text events will be sent to the NLP provider and returned either as a payload event if an intent is found, or untouched if no intent is found. When an intent is found, the value of the payload will be intent:nameOfIntent.
Features and Limitations
Conversation design
Designing a callbot is very different from designing a text-based chatbot. There are however some extra rules to make a successful callbot:
Keep your all your sections short. Nobody wants to listen to (and can remember) a huge block of text!
start:
say Url("https://www.google.com", text="Go to google")
goto end
do channel_type = _metadata._channel.type
// whatsapp can not display clickable buttons
// so we must provide a number to select instead
if (channel_type == "whatsapp-messagebird") say Button("1 - Pick me!")
else if (channel_type == "webapp") say Button("Pick me!")
start:
say "Hi {{_metadata.firstname}}"
say QuickReply(
"Your email address is: {{_metadata.email}}. Do you confirm?",
buttons=[Button("yes"), Button("no")]
)
hold
# will redirect to the step NAME_OF_STEP in the flow called NAME_OF_FLOW
https://chat.csml.dev/s/abc12345678901234?ref=target:NAME_OF_STEP@NAME_OF_FLOW
# or, if no step is provided, the `start` step will be used
https://chat.csml.dev/s/abc12345678901234?ref=target:NAME_OF_FLOW
No matter what NLP provider you pick, any event that passes through this process will have the following properties:
A few additional properties are also set in the resulting event:
event._nlp_provider: contains details about the NLP provider integration
event._nlp_result: contains the raw response from the NLP provider
event.text: contains the original text input
Using NLU in your flows
You can now use the event by matching a found intent with a flow command, by setting that intent as one of the accepted commands for a flow, using the AI Rules feature.
Alternatively, you can also decide to match buttons or other actions within a flow with the found data. For instance, you can use NLP to detect a YES_INTENT and match it without having to list all the possible ways to say "yes" in the button's accepts array.
Caveat: when using a NLU provider, CSML Studio will send all text events to that provider, adding some additional delay in the request handling. If you don't need NLU for your use case (and many great chatbot use cases don't need any NLP), you also don't need to setup a NLU provider. This is completely optional.
CSML Tip: except in very specific scenarios, you should not map your NLU provider's default or fallback intent to a CSML flow, as this would result in a behavior where every input that is not a detected intent triggers that flow.
Instead, fallback intents should continue any currently open conversation or automagically fallback to the default CSML when needed.
// if an intent is found:
event.intent = {
"name": "..." // contains the name of the intent, same
"confidence": "..." // the confidence score that this is the right intent
}
// or, when no intent is found:
event.intent == null
// if other intents match the request:
event.alternative_intents = [ Intent {}, ... ]
// when entities are found, event.entities containes a map of found entities
event.entities.ENTITY_NAME = [
{
"value": "the value",
"metadata": {
// ... additional metadata as returned by the NLP provider
}
}
]
// when this information is known, the processing language code
event.language = "en"
start:
say Question(
"Do you like chocolate?",
buttons=[
Button("Yes", accepts=["intent:YES_INTENT"]) as btny,
Button("No", accepts=["intent:NO_INTENT"]) as btnn,
]
)
hold
if (event.match(btny)) say "I knew it!"
else if (event.match(btnn)) say "I think you are lying..."
goto end
environment variables can not be configured
Apps only get 512MB of RAM by default. Any excessive resource usage will lead the app to stop its execution immediately.
If you are saving the output of your app to a do x = App(..) (or a remember), the data is subject to the usual memory size limitations. In general, if your app returns more than a few KB of data, ask yourself if you really need all that data that you most likely won't be able to display in a chatbot (text-based, so really light) or if you shouldn't strip it down directly in the app itself!
In this example, the chatbot already knows the user's email address and first name
Welcome flow
When a user arrives on the page, the chatbot welcomes them with a flow. It can be any flow, but by default it is the Default flow.
If you do not want a welcome interaction at all, create an empty flow and use that as the Welcome flow!
Menu
The Assistant channels lets you add shortcuts to either flows or external websites:
This will show as a list of searchable shortcuts in the sidebar in full-screen view, or at the top of the input bar in mobile/widget view:
Full-screen view
Mobile / Widget view. The + icon on the right side opens a panel with the searchable list of all shortcuts!
Autocomplete
The autocomplete feature helps your chatbot provide a list of up to 5 items that are contextualized to what the user is currently typing. Think of it as quickly hitting one of the first google search results!
To configure Autocomplete, you need to have a backend endpoint that will handle the requests and respond accordingly. You can configure this endpoint in the Assistant's configuration panel:
The request that will be performed by the Assistant will be as follows:
Your endpoint must return results within 5 seconds as an application/json content-type, formatted as an array of maximum 5 results containing a title, optional highlighting matches, and the corresponding payload.
When a user selects a result, it will behave as a button click where the text is displayed and the payload is sent to the chatbot.
Enabling/disabling autocomplete
If an autocomplete endpoint is set, it will be enabled by default. However, it can be disabled or reenabled dynamically in your CSML script:
Autocomplete status is not persisted across page reloads. When reloading the page, this will always be set to true by default!
This method is usually simple to implement (generate once and for all a set of credentials and load it in the chatbot) but has a major drawback: the same credentials are used for all of your users, which are now only differentiated between them by other means (for example, if the ID key is their email address, you could send them an email with a code to that email address to make sure that they are who they claim they are).
A good example of a service account is for things like database credentials, such as MySQL, MongoDB, or event cloud-based databases such as Airtable or Google Sheets. You will likely use the same database for all of your users: hence, one set of credentials should be stored on the server (never expose them to the end users!) and used for all requests to that service.
In some cases where you can guarantee a high level of trust for the user's inputs (i.e when you can ensure that they are who they claim they are, for example when using an authenticated channel such as Microsoft Teams or Workplace by Meta, or when you verified the email address yourself), the service account could perform some actions on behalf of the user: book an appointment, request a leave of absence...
Using an OAuth2 Flow
In some cases, you may need to authenticate each user separately with their own separate authentication token, or the service does not support creating service accounts. For those cases and on supported channels (Web chat), we provide you with a generic OAuth 2 authorization component. To learn more about OAuth, this website has a lot of very useful information:
To initialize an OAuth flow for a given user, you should start by generating an OAuth App on the service you are going to use, in order to retrieve a client_id and client_secret values. You should also find the service's authorization endpoint (authorization_endpoint) as well as the endpoint where you will generate the access token (token_endpoint).
As an example, Github lets you create custom OAuth apps by visiting https://github.com/settings/developers. As an aside, the "Personal Access Token" method that they offer is similar to creating a service account, but will perform all the API calls as they were made specifically by yourself, and never on behalf of the enduser. It may or may not let you build what you are looking for, hence the OAuth method, which lets the user perform all the calls as themselves.
Note that the Callback URL (sometimes also called Redirect URL) should ALWAYS be https://clients.csml.dev/v1/oauth/response.
You should then generate a Client Secret. NEVER share this value publicly!
We also need the Authorization Endpoint and Token Endpoint values, which we usually find in the API documentation in the "Auth" section. Sure enough, for github, this information can be found here:
You will also need to pass a specific scope in the OAuth request, so that the generated access token has the right permissions for the calls you want to perform. How the scopes work is usually explained in the service's documentation.
Finally, in your CSML Studio code, add the following few lines (adapt with your own OAuth values):
Make sure to update all the values with your own!
This will display the following button:
If the response matches the button, it means that the OAuth flow succeeded. Otherwise, it was not successful (or the user did not authenticate at all).
Using the access token, you can then start authenticating your API calls to the given service!
This integration supports both speech and DTMF (keypad) inputs. When you can, let the caller use the number keypad on their phone, as it has much better success rates than speech to text!
It is impossible/difficult to know in advance what language a user will speak, so we recommend using a different phone number/TwiML app for each language that you intend to serve with this chatbot.
All conversations start at the welcome_flow define in the channel. Callbot conversations never continue where they left off.
To hung up on a user, simply reach a goto end.
By default, there is a timeout of 5s on every hold. If the user does or says nothing, the conversation stops.
Twilio has a web interface to test your chatbot on your TwiML App page. You can use it to test your bot!
Note: this web interface does not support the CallForwarding component.
Components
As you can expect, not all CSML components work well with a callbot, as there is no support for any visual component. However you can use all of the following components:
Text
Question
Audio
Typing
Wait
Callbots on CSML Studio also support an additional custom component, CallForwarding. This allows redirecting the user to a different phone number. This is very useful in a triage type of chatbots: when the request is qualified enough, you can simply redirect the user to the right person or service!
Metadata
Each call made to CSML Studio will have a number of metadata, based on what information is provided by Twilio. An example _metadata object would look like this:
Limitations
For now, you can not create multilingual Twilio callbots as the language is set in the channels settings. However, this feature can be added upon request, so let us know if you need it!
CSML Studio also comes with a number of tools helping you perform day-to-day tasks such as generating QR codes, manipulating dates and times, or scheduling conversation events in the future.
Scheduler
The scheduler is a good way to plan events to happen at a later time. There are 2 types of scheduled events:
webhook, when you want a certain URL to be notified at a later time
broadcast, when you want to create a new conversation with the user later
To install the CSML scheduler, go to Apps > Available Integrations > Scheduler, and click Install.
Example scenario
Imagine an e-commerce chatbot where the user leaves the conversation before checkout, but has items in their cart. In that situation, you might want to send them a reminder a few hours later that they have items in their shopping cart and they might not want to loose them. Heck, why not throw a discount code with it?
Of course, if the user did go through with their order, you want to cancel this reminder, because it does not make sense to keep it.
Here is what this scenario would look like in CSML:
Read below for more information on how to create scheduled items.
Scheduling a webhook call
You can schedule a POST request to a webhook using something like the following:
This means that in about 10 minutes, the endpoint will receive a POST request containing the body { "some": ["custom", "data"] }.
Scheduling a broadcast
Channels that do not support the broadcast feature will also not support scheduled broadcasts.
Hence, scheduled broadcasts are currently only supported on MS Teams, Messenger and Workchat channels.
You can schedule a broadcast to the current user with something like the following:
This means that in about 30 minutes, the user will receive a new conversation initiated by the chatbot from flow nameOfFlow with the given additional metadata.
Cancelling a schedule
It is possible to cancel a scheduled event by calling the following app, where schedule_id is the ID of the schedule you want to cancel:
Example response
Caveats
Events will be executed within 1 minute after your event is scheduled.
If you do not set your own schedule_id, a random schedule_id will be generated.
You can use the
Chatbox
The webapp channel also comes with a configurable website plugin (called the Chatbox) that can be added to any website by adding a single line in your source code. The Chatbox will then appear as a small bubble in the bottom-right corner of your site for every visitor.
Installation
Simply add the following line of code in your source code, just before the closing </body> tag (replace it with the actual line that you can find in your Webapp configuration panel):
Once this is done, a chat bubble will appear as follows on every page where that code is included. Clicking the chat icon will open the chatbox:
Adding a Custom Greeting
The Chatbox lets you configure a custom popup message as well as up to three Quick Action buttons to help you engage more actively with your customers. If both fields are left empty, only the blue chat icon will appear. You can also configure only a popup message or only the action buttons! You can find these configuration options in the Chatbox settings, one of the Web Chat configuration panels.
When configuring Quick Action buttons, you must provide both a title and a payload. The payload can be any string that will be interpreted by CSML. In the example below, those buttons contain a simple payload that match corresponding flows. You can also use an AI Rule trigger as a payload!
Optional Attributes
Several configurations are available as to maximize compatibility across browsers.
data-position
By default, the chatbox will be displayed on the right side of the screen. To display the chatbox on the left instead, simply add data-position="left".
data-webapp-metadata
To add custom metadata in a chatbox (), you need to add a data-webapp-metadata attribute to the chatbox initialization script tag that contains the encoded (with ) JSON string of the metadata you want to inject.
For example: data-webapp-metadata="%7B%22email%22%3A%22jane.doe%40company.com%22%7D"
data-logo-url
You can configure a custom image to be used as the chatbox logo by setting this parameter to the URL of your image. You can use a transparent png or a svg to achieve this effect below, or directly use a square image (it will be rounded automatically) without a transparent background to use as the logo.
For example: data-logo-url="https://cdn.clevy.io/clevy-logo-square-white.png"
data-launcher-fill, data-launcher-background
These two parameters let you change the fill color of the default icons, as well as the background for the launcher button.
Any valid CSS value for these elements is accepted. The default values are:
data-force-open
Force the chatbox to open as soon as the script is loaded. Not recommended as it might be a bit agressive for the visitors of the page, but may be useful in some cases!
data-ref
Set the inner webapp's ref param to trigger a specific flow or step
start:
do user = App("getRandomUser")
say "The random user's name is: {{user.name.first}} {{user.name.last}}"
goto end
start:
say "Hi {{_metadata.firstname}}"
say QuickReply(
"Your email address is: {{_metadata.email}}. Do you confirm?",
buttons=[Button("yes"), Button("no")]
)
hold
say OAuthRequest(
client_id="XXXXX",
client_secret="YYYYYY",
authorization_endpoint="https://github.com/login/oauth/authorize",
token_endpoint="https://github.com/login/oauth/access_token",
scope="repo user",
button=Button("Login with Github", payload="OAUTH_SUCCESS") as success
)
hold
if (event.match(success)) {
say "Your access token is: {{event.access_token}}"
}
else {
say "No access token found in response. Error cause: {{event}}"
}
do listRepos = HTTP("https://api.github.com/user/repos").set({
"Authorization": "token {{token}}",
"Accept": "application/vnd.github+json"
}).send()
// This will redirect the call to the provided number
say CallForwarding("+33123456789")
(an ISO-formatted time string OR unix timestamp integer describing when to schedule the event. Example:
1592843603
,
"2020-06-22T16:33:44.377Z"
) parameters to set the time for your event.
You can schedule events at any point within the next 1 minute - 1 month.
Failed events will not be retried. We guarantee that the event will go off, but make sure that your endpoint is available at the time of the scheduled webhook, or that the channel supports scheduled broadcasts.
The settings panel has a few options to allow you to configure the webapp. Each webapp must have a name, and you can also add an optional description and logo. If needed, you can also link to your own terms and conditions as well.
General information about the channel
Optionally, add a logo and link to your terms and conditions
Welcome flow
When a user arrives on the page, the chatbot welcomes them with a flow. It can be any flow, but by default it is the Default flow.
If you do not want a welcome interaction at all, create an empty flow and use that as the Welcome flow!
Application menu
If you want your users to be able to quickly launch any of your flows, you can use the menu, by adding shortcuts to any of the existing flows. For each flow, you must define a label to make it easily recognizable by your users.
In mobile view, the applications menu will show at the bottom of the screen and slide up when activated:
Referral Parameter
You can launch a specific flow (and step) instead of the default Welcome Flow when loading the webapp by providing a ref parameter in the webapp URL.
There are two ways to use Ref parameters to redirect to flows. You can either configure them in the channel's settings page by adding connections between custom Ref parameters and a target flow:
Or you can use the following special syntax:
The main advantage of the second syntax is that you can generate the links on the go; however, the first method is more flexible as you can easily change where a link is redirected even after it is created, and the content of the Ref parameter is entirely customizable.
Autocomplete
The autocomplete feature helps your chatbot provide a list of up to 5 items that are contextualized to what the user is currently typing. Think of it as quickly hitting one of the first google search results!
To configure Autocomplete, you need to have a backend endpoint that will handle the requests and respond accordingly. You can configure this endpoint in the webapp's configuration panel:
The request that will be performed by the webapp will be as follows:
Your endpoint must return results within 5 seconds as an application/json content-type, formatted as an array of maximum 5 results containing a title, optional highlighting matches, and the corresponding payload.
When a user selects a result, it will behave as a button click where the text is displayed and the payload is sent to the chatbot.
Enabling/disabling autocomplete
If an autocomplete endpoint is set, it will be enabled by default. However, it can be disabled or reenabled dynamically in your CSML script:
Autocomplete status is not persisted across page reloads. When reloading the page, this will always be set to true by default!
Chat API
The Chat API allows you to send chat requests to your bot on behalf of an end user. You can send a text request, and receive the bot's response in return.
This API works synchronously by default: you will receive all of the bot's messages in one array in response to your request.
POST /chat
You can query the Chat API by sending a simple text message for analysis. This will either continue any previous conversation or start a new one.
Features
Text
Google Chat lets you format text. So you can either use regular text or formatted text:
start:
say "Thanks for shopping with us!"
goto shop
shop:
// cancel any existing reminder
if (sched) do App("utils/scheduler", action="cancel", schedule_id="cart_reminder")
// ... get the user to buy some items
say Question("Select an item to buy", buttons=[Button("Mascara"), Button("Perfume")])
hold
// then add a new reminder with ID "cart_reminder"
remember sched = App("utils/scheduler", delay="1 hr", flow_id="remind_cart", schedule_id="cart_reminder")
say "You have {{cart.count}} items in your shopping cart, for a total of ${{cart.total}}"
say Question(
"What do you want to do?",
button_type="quick_reply",
buttons=[
Button("Continue shopping 🛍") as shop,
Button("Go to checkout 💵") as checkout,
]
)
hold
// the user wants to continue shopping, let them do that
if (event.match(shop)) {
goto shop
}
goto checkout
checkout:
// execute the order from the user
say "Go to stripe payment page to pay here: XXX"
hold
// no need to remind the user anymore, they already paid
if (sched) do App("utils/scheduler", action="cancel", schedule_id="cart_reminder")
do sched = App(
"utils/scheduler",
action = "webhook",
url = "https://my.url.com/whatever",
body = { "some": ["custom", "data"] },
delay = "10 min",
)
say "Created scheduled event with ID {{sched.result.schedule_id}}"
do sched = App(
"utils/scheduler",
action = "broadcast",
flow_id = "nameOfFlow",
metadata = { "some": ["custom", "data"] },
delay = "3 hrs",
)
say "Created scheduled event with ID {{sched.result.schedule_id}}"
do App(
"utils/scheduler",
action = "cancel",
schedule_id = schedule_id
)
The following message types are accepted (see below for payload examples): text, image, video, audio, file, url, payload, flow_trigger.
Additional properties can be added to the message's content and will be available as event.my_added_prop in the context of the CSML.
Triggering a specific flow
To trigger a specific flow, you can send the following event:
You can also choose to force-close any previously open conversation with close_flows. If you don't close previous conversations and the flow is a recursive flow (i.e has no hold keywords), then the previous conversation will be relaunched at the last available step in that flow.
Request body
Name
Type
Description
*metadata
object
Key-value pairs of metadata to inject into the conversation
request_id
string
Response body
Name
Type
Description
request_id
string
A random client-issued string for tracing requests. If none is provided, will be automatically generated
conversation_end
boolean
Typing, Wait
Google Chat does not have a typing indicator. Typings are simply interpreted as delays.
Url, Audio, File
Google Chat unfurls URLs and displays a preview of the content of the page. For instance:
Google does not provide a way to display an audio player or to upload a file from the bot. These components will be rendered as simple Urls.
Image
Video
In some cases, Google Chat will be able to automatically display a video player in the conversation. This is obviously the case with Youtube videos, but it also works with some other players.
In other cases, you can add some optional parameters to the video to wrap it and render it better:
title - the title that will appear on the video card
thumbnail_url - the url to the thumbnail image
button - the clickable button to open the video
Carousel, Card
There is no concept of Carousel in Google Chat, but cards can be stacked vertically. When using a Carousel component, this is the end result:
In the Google Chat configuration panel, you can setup slash commands for your bot. These are nice ways to force trigger a CSML flow.
To setup a slash command, you need to create the command like so:
Then, in the AI Rules panel in CSML Studio, add a rule for this command triggering a specific flow:
When the command is used, the specified flow will be triggered with the following payload:
Event Metadata
A sample _metadata for an incoming event will be similar to the following object:
Regular text
Formatted text
Any of your flows can be a Welcome flow
Define a menu for your users
This will show in the top-right corner in desktop mode
Message formats
List of available message formats in Slack channel
Text
Slack has partial markdown support in text components.
Typing, Wait
In Slack, Wait and Typing have the same behavior. No typing indicator exists in slack, so the bot will simply wait for the duration given (in milliseconds) before the next message is processed.
Question, Button
Slack makes it possible to style your buttons and define a custom payload that is sent to the chatbot on click. Available styles are "danger" and "primary". Slacks recommends to only use primary on one button in a list, and danger even less often.
CSML Studio will also take advantage of Slack's features to update the content of the component when an option is chosen, so that the user's choice appears clearly after they select an option.
Image
Send the URL of an image. Slack will attempt to display it.
Video, Audio, Url
Generic files will render as standard URLs. When it can, Slack will try to display the URL nicely, such as the Wikipedia link below.
Carousel, Card
A Carousel is essentially a collection of Card elements A single Card will display as a Carousel of 1 element.
You can add several Button or Url buttons to your Card components.
Input, Textarea
Radio, Dropdown
Multiselect, Checkbox
Calendar
Full reference
For a complete reference of all the code presented on this page, refer to the :
Event Metadata
A sample _metadata for an incoming event will be similar to the following object:
Message formats
Text
Markdown support is scarce for Messenger, and various clients may render it differently. , text formatting is only visible on a computer, and will not appear in the Messenger app on mobile.
say "His palms are sweaty, knees weak, arms are heavy" // short form
say Text("There's vomit on his sweater already, mom's spaghetti") // long form
/**
* Text formatting:
* bold: * before and after text.
* italic: _ before and after text.
* stripe: ~ before and after text.
* integrated code block: ` before and after text.
* multiline code block: ``` before and after text.
*/
say "He's _nervous_, but *on the surface* he looks ~calm and ready~ To `drop` candies, but he ```keeps on forgettin```"
say Url("https://www.wikipedia.org/")
say Image("https://picsum.photos/200")
say Video("https://www.youtube.com/watch?v=CS58YQaVIaA")
say Video(
"https://www.learningcontainer.com/wp-content/uploads/2020/05/sample-mp4-file.mp4",
title="Lorem ipsum",
button=Button("Play this video"),
thumbnail_url="https://picsum.photos/200"
)
do card1 = Card(
"The Marshall Mathers LP",
subtitle="Release date: May 23, 2000",
image_url="https://upload.wikimedia.org/wikipedia/en/a/ae/The_Marshall_Mathers_LP.jpg",
default_action=Url("https://www.eminem.com/"),
buttons=[
Button("Listen to this album", payload="marshallmatherslp1"),
Url("https://www.eminem.com/", text="Visit eminem.com"),
]
)
do card2 = Card(
"The Slim Shady LP",
subtitle="Release date: February 23, 1999",
image_url="https://upload.wikimedia.org/wikipedia/en/3/35/Eminem_-_The_Slim_Shady_LP_CD_cover.jpg",
default_action=Url("https://www.eminem.com/"),
buttons=[
Button("Listen to this album", payload="theslimshadylp"),
Url("https://www.eminem.com/", text="Visit eminem.com"),
]
)
do card3 = Card(
"The Marshall Mathers LP 2",
subtitle="Release date: November 5, 2013",
image_url="https://upload.wikimedia.org/wikipedia/en/8/87/The_Marshall_Mathers_LP_2.png",
default_action=Url("https://www.eminem.com/"),
buttons=[
Button("Listen to this album", payload="marshallmatherslp2"),
Url("https://www.eminem.com/", text="Visit eminem.com"),
]
)
say Carousel(cards=[card1, card2, card3])
# will redirect to the step NAME_OF_STEP in the flow called NAME_OF_FLOW
https://chat.csml.dev/s/abc12345678901234?ref=target:NAME_OF_STEP@NAME_OF_FLOW
# or, if no step is provided, the `start` step will be used
https://chat.csml.dev/s/abc12345678901234?ref=target:NAME_OF_FLOW
curl -X "POST" "https://my.example.com/autocomplete?token=some-auth-token" \
-H 'Content-Type: application/json;charset=utf-8' \
-d $'{"text": "Give me the best result"}'
say "His palms are sweaty, knees weak, arms are heavy"
say Text("There's vomit on his sweater already, mom's spaghetti")
say "He's _nervous_, but **on the surface** he looks ~calm and ready~"
A random client-issued string for tracing requests. If none is provided, will be automatically generated.
UTC time at which the message was received by the CSML server
Typing, Wait
Obviously, Wait is also supported (it simply does not display a typing indicator or anything for the given duration).
Question, Button
Both Button() and Url() button types are supported:
You can also take advantage of Facebook's "quick_reply" buttons. Here they are shown with a given payload (which would also work on the above example). There are 2 main differences between regular buttons and quick_replies:
you can have a maximum of 3 buttons, but up to 13 quick_reply buttons
quick_reply buttons go away once the user clicks on one or says something, regular buttons stay forever
quick_reply buttons do not support Url() types
Messenger does not support a rendering a singleButton component by itself. You must use buttons as part of Question or Card components.
Video, Audio, Image, File
The media components behave exactly as the Attachment Upload API does in Messenger, with the same limitations.
If for some reason, we are unable to send a file, it will fallback to a simple Url component. For this reason, third-party media players will be rendered as simple links to those players, while raw media can show as a regular file/audio/video/image in the conversation.
The main limitations to know about are:
file must be publicly accessible (not behind firewall, not requiring any authentication)
file must be < 25MB in size
file must be able to upload to messenger in a reasonable amount of time
Url
Send the given URL in a simple text component.
If a text parameter is present, it will be ignored, as Messenger is unable to display hyperlinks. The raw URL will always be used.
To display a nice URL, wrap it as a button to a Question or Card component.
Carousel, Card
A Carousel is essentially a collection of Card elements A single Card will display as a Carousel of 1 element.
The Card component on Messenger supports up to 3 Button or Url buttons. You can also define an optional default_action with a Url component on each card to make the card itself clickable.
Raw object
You can send any valid message as per Messenger's Send API as a raw object. For instance, taking this example from the documentation without any modification:
Full reference
For a complete reference of all the code presented on this page, refer to the following gist:
A "thumb up" button click is interpreted as a special Payload component event. CSML will receive the following data:
Buttons and quick replies
Messenger differentiates between several types of buttons. Currently, CSML Studio will allow you to send either or buttons.
Regular buttons are larger elements, and remain on screen after the user has clicked on them. Quick replies will display just above the user input and disappear once clicked. You can also fit more quick_reply buttons (13) than regular buttons (3) per event.
To send quick_reply events, use the following syntax:
There are several types of . You can play with the type and image_url attributes. By default, quick_reply buttons are of type text. The requirements/limitations defined in Facebook's documentation apply.
Carousel
Messenger provides a Carousel format which is quite interesting for some use cases. It allows for horizontal scrolling of one or several Cards, each having the ability to display an optional image and up to 3 buttons.
It is perfect as a menu for selecting what to do next!
Messenger's Carousel is a slightly specialized version of CSML's Carousel component: it has the same default parameters but additional options are available:
Raw objects
Some behaviors are currently unmatched with CSML components. The coverage for messenger templates will grow over time, however, please note that if you need to send a very specific template, you can always send the raw Messenger-formatted object.
For example, whilst CSML does not (yet) cover Airline Templates for Messenger, you can always send a raw object if you need it:
Broadcast
Messenger supports , with some important caveats. You should read carefully what the limitations are on . In short:
You can send any message that you want to any user that previously sent a message to the bot in the last 24 hours
Messages must be sent exclusively to the app-scoped user ID (you can not send a broadcast using the user's email address for example)
After this 24-hours window, you must include one of the valid in your request. This is done by adding a "message_tag":"TAG_NAME"
Failing to respect this rule may get your chatbot and/or page banned from facebook!
Limitations
In general, all Messenger limitations apply. For example, texts can not be larger than 2000 UTF-8 characters, and attachment sizes (Videos, Audio, Files) can not be larger than 25MB.
Regular buttons are limited to 3 per single event, while quick_reply buttons allow up to 13 buttons. The length of the button title should also never be longer than 20 characters.
Single Button Components
Messenger requires buttons to have an accompanying text. The following CSML code will display an error message in the conversation, as a Button can not be used alone:
You should always use a Question component instead:
Fallbacks
Files that are larger than 25MB will be sent as simple text instead of uploaded as attachments
Nice URLs are unavailable. They will display as simple text instead
Youtube/Dailymotion/Vimeo videos as well as Spotify/Deezer/Soundcloud audios will display as simple text
Notifications
Due to in the way Messenger handles sending notifications to your users, CSML Studio does not allow sending messages to users except for the regular use case of responding directly to a request the user made (by sending a text message, clicking a button, etc.). To send one-way notifications (or broadcasts) to your users, you need to build your own separate logic.
Event Metadata
A sample _metadata for an incoming event will be similar to the following object:
say "His palms are sweaty, knees weak, arms are heavy" // short form
say Text("There's vomit on his sweater already, mom's spaghetti") // long form
say "He's _nervous_, but **on the surface** he looks [calm and ready](https://www.youtube.com/watch?v=_Yhyp-_hX2s)"
say Typing(1000)
say Question(
"Hi! My name is:", // equivalent to title="Hi! My name is:",
buttons=[Button("What?"), Button("Who?")]
)
say Question(
"Hi! My name is",
buttons=[
Button("Slim Shady"),
Url("https://eminem.com", text="Go to website")
]
)
say Question(
"Hi! My name is:",
button_type="quick_reply",
buttons=[
Button("What?", payload="btn1"),
Button("Who?", payload="btn2"),
]
)
say Image("https://images.unsplash.com/photo-1560114928-40f1f1eb26a0")
say Video("https://cdn.csml.dev/customers/93bfb0df-fb6b-4ed2-87b0-8d93a09b0ad8/files/cbaa0959-fe58-4a2a-89c3-c414a1f38748/big_buck_bunny.mp4")
say Audio("https://open.spotify.com/track/1xB3YT8Rakvnfcc1dp2kzJ")
say Url("https://www.wikipedia.org/")
do card1 = Card(
"The Marshall Mathers LP",
subtitle="Release date: May 23, 2000",
image_url="https://upload.wikimedia.org/wikipedia/en/a/ae/The_Marshall_Mathers_LP.jpg",
default_action=Url("https://www.eminem.com/"),
buttons=[
Button("Listen to this album", payload="marshallmatherslp1"),
Url("https://www.eminem.com/", text="Visit eminem.com"),
]
)
do card2 = Card(
"The Slim Shady LP",
subtitle="Release date: February 23, 1999",
image_url="https://upload.wikimedia.org/wikipedia/en/3/35/Eminem_-_The_Slim_Shady_LP_CD_cover.jpg",
default_action=Url("https://www.eminem.com/"),
buttons=[
Button("Listen to this album", payload="theslimshadylp"),
Url("https://www.eminem.com/", text="Visit eminem.com"),
]
)
do card3 = Card(
"The Marshall Mathers LP 2",
subtitle="Release date: November 5, 2013",
image_url="https://upload.wikimedia.org/wikipedia/en/8/87/The_Marshall_Mathers_LP_2.png",
default_action=Url("https://www.eminem.com/"),
buttons=[
Button("Listen to this album", payload="marshallmatherslp2"),
Url("https://www.eminem.com/", text="Visit eminem.com"),
]
)
say Carousel(cards=[card1, card2, card3])
say Question(
"Hi! My name is:",
buttons=[
Button("What?", payload="btn1"),
Button("Who?", payload="btn2", style="danger"),
Button("Slim Shady", payload="btn3", style="primary"),
]
)
hold
say "User selected: {{event}}"
say Image(
"http://placekitten.com/500/500",
title="Nice kitten", // optional
alt="this is a photo of a cute kitten", // optional
)
say Video("https://cdn.csml.dev/customers/93bfb0df-fb6b-4ed2-87b0-8d93a09b0ad8/files/cbaa0959-fe58-4a2a-89c3-c414a1f38748/big_buck_bunny.mp4")
say Audio("https://www.soundhelix.com/examples/mp3/SoundHelix-Song-1.mp3")
say Url("https://www.wikipedia.org/")
do card1 = Card(
"The Marshall Mathers LP",
subtitle="Release date: May 23, 2000",
image_url="https://upload.wikimedia.org/wikipedia/en/a/ae/The_Marshall_Mathers_LP.jpg",
buttons=[
Button("Listen to this album", payload="marshallmatherslp1"),
Url("https://www.eminem.com/", text="Visit eminem.com"),
]
)
do card2 = Card(
"The Slim Shady LP",
subtitle="Release date: February 23, 1999",
image_url="https://upload.wikimedia.org/wikipedia/en/3/35/Eminem_-_The_Slim_Shady_LP_CD_cover.jpg",
buttons=[
Button("Listen to this album", payload="theslimshadylp"),
Url("https://www.eminem.com/", text="Visit eminem.com"),
]
)
do card3 = Card(
"The Marshall Mathers LP 2",
subtitle="Release date: November 5, 2013",
image_url="https://upload.wikimedia.org/wikipedia/en/8/87/The_Marshall_Mathers_LP_2.png",
buttons=[
Button("Listen to this album", payload="marshallmatherslp2"),
Url("https://www.eminem.com/", text="Visit eminem.com"),
]
)
say Carousel(cards=[card1, card2, card3])
// the same works with Textarea()
say Input(
title="Enter something below",
description="This is a simple text field, and you can say whatever you want",
placeholder="Whatever you want",
submit_label="Submit",
)
// the same works with Dropdown()
say Radio(
// Mandatory
options = [
Button("Cats 🐕", payload="meow"),
Button("Dogs 🐶", payload="woof"),
Button("Hot dogs 🌭", payload="yummy"),
],
// Optional fields:
title="What's your favorite animal?",
description="You can only pick one!",
)
// the same works with Multiselect()
say Checkbox(
// Mandatory
options = [
Button("Cats 🐕", payload="meow"),
Button("Dogs 🐶", payload="woof"),
Button("Hot dogs 🌭", payload="yummy"),
],
// Optional fields:
title="What's your favorite animal?",
description="You can pick many!",
)
say Calendar(title="Select your date of birth", submit_label="OK")
The Text component also supports some basic Markdown:
Typing, Wait
Display a typing indicator for the requested time expressed in milliseconds. Obviously, Wait is also supported (it simply does not display a typing indicator or anything for the given duration).
Image
Question, Button
If you need to retrieve a specific data when clicking on either button, use the payload argument of the Button component:
The Assistant channel also supports single Button components. However, as cross-channel support for single buttons is not guaranteed, we encourage you to use the standard Question component instead, with a title.
QuickReply
Quick replies are similar to Questions, where the buttons are removed from view once the user has selected one of them. In a majority of scenarios, you should prefer QuickReplies over regular questions, especially when you don't want the user to be able to scroll up and select one of the buttons after they have made a first choice. Questions should be used when a button is used as a trigger to a given flow (as configured in the bot's ).
Try this bot:
Video, Audio
The Video component supports links to mp4 files, as well as Youtube, Vimeo and Dailymotion URLs. The Audio component supports links to mp3 files, as well as Spotify, Soundcloud and Deezer URLs.
Standard limitations apply: if the end user is not logged in to a valid spotify/deezer/soundcloud account, only 30s will be playable in the audio component.
For full control over the clip, prefer using a standard mp3 file URL.
Url
The Url component will automatically retrieve the target's favicon if available. If a text parameter is present, it will be used as the component's title.
Carousel, Card
A Carousel is essentially a collection of Card elements A single Card will display as a Carousel of 1 element. Each Card can have a maximum of 2 Button elements.
The cards themselves can be made clickable by adding an optional default_action Url() parameter:
The carousel can also automatically navigate horizontaly by adding the optional autoplay parameter (which defaults to false):
Calendar
This component will display a rich calendar in the webapp. By default, when passed with no argument, a simple single-date datepicker will appear:
Optional parameters allow to set a min_date and/or max_date (by unix timestamp, in milliseconds) or an input_mode to accept single (the default) multiple or range inputs by the user:
The event value of a Calendar input will be comma-separated values of all user inputs. Also, event.input_mode will be set to the mode of the requested calendar, so that you can differenciate between single, multiple and range modes when receiving values.
Try this bot:
Input
To gain some control over what a user can enter in a form (for example, if you need to make sure they only enter an email address or a valid number when required), you can also use the Input component.
There are several variants of input fields: email, text, textarea, number and password. By default, inputs are type="text". All parameters are optional, and the basic usage is as follows:
You can check this reference about the minlength and maxlength parameters:
A completely bare say Input() component will result in a simple, empty text input.
Inputs with type="number" can have some different parameters, just like HTML inputs (all are optional as well):
You can check this reference about the min and max parameters: .
To learn more about the inputs with type="password", read the documentation about secure inputs (hold_secure):
Radio
Display a radio buttons component:
Multiselect, Checkbox
If you want to let users select multiple options, the Multiselect() or `Checkbox()` components are a great solution. Users will be able to select any number of options in the given list. You can force a min and max number of choices, or if required=true, it means that at least one option must be selected to continue.
Both the Multiselect and Checkbox components work exactly the same, only the display will be different. Try both to find out which one suits you best!
When several options are selected, you will receive a comma-separated list of the corresponding payloads (not necessarily the button's title!), in the order they were selected by the user.
Dropdown
Like the Radio component, the Dropdown lets users pick an option from a list:
LaTeX
is a popular language that lets you write (among other things) complex math formulas. The webapp and chatbox include to support this language natively with a custom component:
You can find more examples of supported formats on the KaTeX documentation: . Please keep in mind that backslashes (\) must be escaped properly in your code!
You can also add LaTeX inline in any standard text like by encapsulating it inside {latex}...{/latex} tags:
Try this bot:
Signature
You can display a simple signature field i.e to collect user consent and receive it as a png file.
Try this bot:
say "His palms are sweaty, knees weak, arms are heavy" // short form
say Text("There's vomit on his sweater already, mom's spaghetti") // long form
say "He's _nervous_, but **on the surface** he looks [calm and ready](https://www.youtube.com/watch?v=_Yhyp-_hX2s)"
say Image("https://images.unsplash.com/photo-1560114928-40f1f1eb26a0")
say Question(
"Hi! My name is:", // equivalent to title="Hi! My name is:",
buttons=[Button("What?"), Button("Who?")]
)
say Question(
"Hi! My name is:",
buttons=[
Button("What?", payload="btn1"),
Button("Who?", payload="btn2"),
]
)
hold
say "user clicked on button with the {{event}} payload"
say QuickReply(
"Do you like cheese?",
buttons=[Button("Yes 🧀"), Button("Also yes 🫕")]
)
say Video("https://www.youtube.com/watch?v=lqBhgEQ4LT0")
say Audio("https://open.spotify.com/track/1xB3YT8Rakvnfcc1dp2kzJ")
say Url("https://www.wikipedia.org/", text="Visit Wikipedia")
// if you don't want to display the URL itself, making it harder
// to identify that it is a link and not just an action button, add `hide_url=true`
say Url("https://www.wikipedia.org/", text="Visit Wikipedia", hide_url=true)
do card1 = Card(
"The Marshall Mathers LP",
subtitle="Release date: May 23, 2000",
image_url="https://upload.wikimedia.org/wikipedia/en/a/ae/The_Marshall_Mathers_LP.jpg",
buttons=[Button("Listen to this album", payload="marshallmatherslp1")]
)
do card2 = Card(
"The Slim Shady LP",
subtitle="Release date: February 23, 1999",
image_url="https://upload.wikimedia.org/wikipedia/en/3/35/Eminem_-_The_Slim_Shady_LP_CD_cover.jpg",
buttons=[Button("Listen to this album", payload="theslimshadylp")]
)
do card3 = Card(
"The Marshall Mathers LP 2",
subtitle="Release date: November 5, 2013",
image_url="https://upload.wikimedia.org/wikipedia/en/8/87/The_Marshall_Mathers_LP_2.png",
buttons=[Button("Listen to this album", payload="marshallmatherslp2")]
)
say Carousel(cards=[card1, card2, card3])
do card = Card(
"The Marshall Mathers LP",
subtitle="Release date: May 23, 2000",
default_action=Url("https://en.wikipedia.org/wiki/Eminem"),
image_url="https://upload.wikimedia.org/wikipedia/en/a/ae/The_Marshall_Mathers_LP.jpg",
buttons=[Button("Listen to this album", payload="marshallmatherslp1")]
)
say Carousel([ card1, card2, card3 ], autoplay=true)
say Calendar()
say Calendar(
min_date="2021-04-02", // April 2nd, 2021
max_date="2021-06-18", // June 18th, 2021
input_mode="range" // can also be "multiple" or "single"
)
// given this sample CSML code
say Calendar(...)
hold
say "{{event.get_content()}}"
// example single mode
{
"input_mode":"single",
"payload":"2021-04-07T00:00:00.000+02:00"
}
// example multiple mode
{
"input_mode":"multiple",
"payload":"2021-04-07T00:00:00.000+02:00,2021-04-15T00:00:00.000+02:00,2021-04-20T00:00:00.000+02:00"
}
// example range mode
{
"input_mode":"range",
"payload":"2021-04-07T00:00:00.000+02:00,2021-04-15T00:00:00.000+02:00"
}
say Input(
type="text", // default
title="What is this field?",
description="Some details about what is expected",
minlength=0, // for text/email/textarea inputs only
maxlength=100, // for text/email/textarea inputs only
required=false,
placeholder="This is an input",
default_value="This is set by default",
submit_label="Submit" // the text for the validation button, defaults to OK
)
say Input(
type="number",
title="Enter a number",
min=-14.3,
max=42,
// the other parameters from the previous example also apply
)
say Radio(
// Mandatory
options = [
Button("Cats 🐕", payload="meow"),
Button("Dogs 🐶", payload="woof"),
Button("Hot dogs 🌭", payload="yummy"),
],
// Optional fields:
title="What's your favorite animal?",
description="You can only pick one!",
selected = "yummy", // Preselect a value
)
// A list of options that are highlighted as you select them
say Multiselect(
title="Why do you like CSML?",
description="Select all options that apply!",
min=2,
submit_label="Yes, that's it!",
options=[
Button("It's easy to learn", payload="easy"),
Button("It's pretty quick", payload="fast"),
Button("It's scalable", payload="scalable"),
Button("It's fun", payload="fun"),
Button("The mascot 🦜 is cool", payload="pako"),
]
)
// The same component also works as a simple checkbox list
say Checkbox(
title="Why do you like CSML?",
description="Select all options that apply!",
min=2,
submit_label="Yes, that's it!",
options=[
Button("It's easy to learn", payload="easy"),
Button("It's pretty quick", payload="fast"),
Button("It's scalable", payload="scalable"),
Button("It's fun", payload="fun"),
Button("The mascot 🦜 is cool", payload="pako"),
]
)
say Dropdown(
// Mandatory list of options
options=[
Button("It's easy to learn", payload="easy"),
Button("It's pretty quick", payload="fast"),
Button("It's scalable", payload="scalable"),
Button("It's fun", payload="fun"),
Button("The mascot 🦜 is cool", payload="pako"),
],
// Optional parameters
title="Why do you like CSML?",
description="Select the principal reason!",
placeholder="They are all good reasons...",
selected="easy", // value selected by default
submit_label="Yes, that's it!",
)
start:
say LaTeX(
"\(x^2 + y^2 = z^2\)",
// If the user has "audio mode" enabled the tts parameter
// will be used as the basis for the speech synthesis
tts="This is the Pythagorean theorem!",
)
say LaTeX("\\def\\arraystretch{1.5}
\\begin{array}{c:c:c}
a & b & c \\\\ \\hline
d & e & f \\\\
\\hdashline
g & h & i
\\end{array}")
say "This equation {latex} \(x^2 + y^2 = z^2\) {/latex} is super cool"
// Display a simple signature field
say Signature()
// The field can be customized (all parameters are optional)
say Signature(
"Please sign here!",
description="Yes please do!",
submit_label="I consent"
)
Message Formats
Text
The Text component of the Webapp channel also supports some basic Markdown:
Typing, Wait
Obviously, Wait is also supported (it simply does not display a typing indicator or anything for the given duration).
Image
Question, Button
If you need to retrieve a specific data when clicking on either button, use the payload argument of the Button component:
The Webapp channel also supports single Button components. However, as cross-channel support for single buttons is not guaranteed, we encourage you to use the standard Question component instead, with a title.
QuickReply
Quick replies are similar to Questions, where the buttons are removed from view once the user has selected one of them. In a majority of scenarios, you should prefer QuickReplies over regular questions, especially when you don't want the user to be able to scroll up and select one of the buttons after they have made a first choice. Questions should be used when a button is used as a trigger to a given flow (as configured in the bot's ).
Try this bot:
UserInput
In some cases it may be desirable to temporarily disable the user input to force the user to select one of the options without letting them type anything.
Please note that if the page is refreshed, the user input will go back to being enabled by default even if it was first disabled.
Try this bot:
Video, Audio
The Video component supports links to mp4 files, as well as Youtube, Vimeo and Dailymotion URLs. The Audio component supports links to mp3 files, as well as Spotify, Soundcloud and Deezer URLs.
Standard limitations apply: if the end user is not logged in to a valid spotify/deezer/soundcloud account, only 30s will be playable in the audio component.
For full control over the clip, prefer using a standard mp3 file URL.
Url
The Url component will automatically retrieve the target's favicon if available. If a text parameter is present, it will be used as the component's title.
Carousel, Card
A Carousel is essentially a collection of Card elements A single Card will display as a Carousel of 1 element. Each Card can have a maximum of 2 Button elements.
The cards themselves can be made clickable by adding an optional default_action Url() parameter:
The carousel can also automatically navigate horizontaly by adding the optional autoplay parameter (which defaults to false):
Calendar
This component will display a rich calendar in the webapp. By default, when passed with no argument, a simple single-date datepicker will appear:
Optional parameters allow to set a min_date and/or max_date (by unix timestamp, in milliseconds) or an input_mode to accept single (the default) multiple or range inputs by the user:
The event value of a Calendar input will be comma-separated values of all user inputs. Also, event.input_mode will be set to the mode of the requested calendar, so that you can differenciate between single, multiple and range modes when receiving values.
Try this bot:
Input
To gain some control over what a user can enter in a form (for example, if you need to make sure they only enter an email address or a valid number when required), you can also use the Input component.
There are several variants of input fields: email, text, textarea, number and password. By default, inputs are type="text". All parameters are optional, and the basic usage is as follows:
You can check this reference about the minlength and maxlength parameters:
A completely bare say Input() component will result in this simple, empty text input:
Inputs with type="number" can have some different parameters, just like HTML inputs (all are optional as well):
You can check this reference about the min and max parameters: .
To learn more about the inputs with type="password", read the documentation about secure inputs (hold_secure):
Radio
Display a radio buttons component:
Multiselect, Checkbox
If you want to let users select multiple options, the Multiselect() or `Checkbox()` components are a great solution. Users will be able to select any number of options in the given list. You can force a min and max number of choices, or if required=true, it means that at least one option must be selected to continue.
Both the Multiselect and Checkbox components work exactly the same, only the display will be different. Try both to find out which one suits you best!
When several options are selected, you will receive a comma-separated list of the corresponding payloads (not necessarily the button's title!), in the order they were selected by the user. In the case above, you would receive:
Dropdown
Like the Radio component, the Dropdown lets users pick an option from a list:
LaTeX
is a popular language that lets you write (among other things) complex math formulas. The webapp and chatbox include to support this language natively with a custom component:
You can find more examples of supported formats on the KaTeX documentation: . Please keep in mind that backslashes (\) must be escaped properly in your code!
You can also add LaTeX inline in any standard text like by encapsulating it inside {latex}...{/latex} tags:
Try this bot:
Signature
You can display a simple signature field i.e to collect user consent and receive it as a png file.
Try this bot:
OAuthRequest
You can use the OAuthRequest component as specified here:
say "His palms are sweaty, knees weak, arms are heavy" // short form
say Text("There's vomit on his sweater already, mom's spaghetti") // long form
say "He's _nervous_, but **on the surface** he looks [calm and ready](https://www.youtube.com/watch?v=_Yhyp-_hX2s)"
say Image("https://images.unsplash.com/photo-1560114928-40f1f1eb26a0")
say Question(
"Hi! My name is:", // equivalent to title="Hi! My name is:",
buttons=[Button("What?"), Button("Who?")]
)
say Question(
"Hi! My name is:",
buttons=[
Button("What?", payload="btn1"),
Button("Who?", payload="btn2"),
]
)
hold
say "user clicked on button with the {{event}} payload"
say QuickReply(
"Do you like cheese?",
buttons=[Button("Yes 🧀"), Button("Also yes 🫕")]
)
say UserInput(false) // disables the user input
say UserInput(true) // reenables the user input
say Video("https://www.youtube.com/watch?v=lqBhgEQ4LT0")
say Audio("https://open.spotify.com/track/1xB3YT8Rakvnfcc1dp2kzJ")
say Url("https://www.wikipedia.org/", text="Visit Wikipedia")
// if you don't want to display the URL itself, making it harder
// to identify that it is a link and not just an action button, add `hide_url=true`
say Url("https://www.wikipedia.org/", text="Visit Wikipedia", hide_url=true)
do card1 = Card(
"The Marshall Mathers LP",
subtitle="Release date: May 23, 2000",
image_url="https://upload.wikimedia.org/wikipedia/en/a/ae/The_Marshall_Mathers_LP.jpg",
buttons=[Button("Listen to this album", payload="marshallmatherslp1")]
)
do card2 = Card(
"The Slim Shady LP",
subtitle="Release date: February 23, 1999",
image_url="https://upload.wikimedia.org/wikipedia/en/3/35/Eminem_-_The_Slim_Shady_LP_CD_cover.jpg",
buttons=[Button("Listen to this album", payload="theslimshadylp")]
)
do card3 = Card(
"The Marshall Mathers LP 2",
subtitle="Release date: November 5, 2013",
image_url="https://upload.wikimedia.org/wikipedia/en/8/87/The_Marshall_Mathers_LP_2.png",
buttons=[Button("Listen to this album", payload="marshallmatherslp2")]
)
say Carousel(cards=[card1, card2, card3])
do card = Card(
"The Marshall Mathers LP",
subtitle="Release date: May 23, 2000",
default_action=Url("https://en.wikipedia.org/wiki/Eminem"),
image_url="https://upload.wikimedia.org/wikipedia/en/a/ae/The_Marshall_Mathers_LP.jpg",
buttons=[Button("Listen to this album", payload="marshallmatherslp1")]
)
say Carousel([ card1, card2, card3 ], autoplay=true)
say Calendar()
say Calendar(
min_date=1617494400000, // April 4th, 2021
max_date=1623974400000, // June 18th, 2021
input_mode="range" // can also be "multiple" or "single"
)
// given this sample CSML code
say Calendar(...)
hold
say "{{event.get_content()}}"
// example single mode
{
"input_mode":"single",
"payload":"2021-04-07T00:00:00.000+02:00"
}
// example multiple mode
{
"input_mode":"multiple",
"payload":"2021-04-07T00:00:00.000+02:00,2021-04-15T00:00:00.000+02:00,2021-04-20T00:00:00.000+02:00"
}
// example range mode
{
"input_mode":"range",
"payload":"2021-04-07T00:00:00.000+02:00,2021-04-15T00:00:00.000+02:00"
}
say Input(
type="text", // default
title="What is this field?",
description="Some details about what is expected",
minlength=0, // for text/email/textarea inputs only
maxlength=100, // for text/email/textarea inputs only
required=false,
placeholder="This is an input",
default_value="This is set by default",
submit_label="Submit" // the text for the validation button, defaults to OK
)
say Input(
type="number",
title="Enter a number",
min=-14.3,
max=42,
// the other parameters from the previous example also apply
)
say Radio(
// Mandatory
options = [
Button("Cats 🐕", payload="meow"),
Button("Dogs 🐶", payload="woof"),
Button("Hot dogs 🌭", payload="yummy"),
],
// Optional fields:
title="What's your favorite animal?",
description="You can only pick one!",
selected = "yummy", // Preselect a value
)
// A list of options that are highlighted as you select them
say Multiselect(
title="Why do you like CSML?",
description="Select all options that apply!",
min=2,
submit_label="Yes, that's it!",
options=[
Button("It's easy to learn", payload="easy"),
Button("It's pretty quick", payload="fast"),
Button("It's scalable", payload="scalable"),
Button("It's fun", payload="fun"),
Button("The mascot 🦜 is cool", payload="pako"),
]
)
// The same component also works as a simple checkbox list
say Checkbox(
title="Why do you like CSML?",
description="Select all options that apply!",
min=2,
submit_label="Yes, that's it!",
options=[
Button("It's easy to learn", payload="easy"),
Button("It's pretty quick", payload="fast"),
Button("It's scalable", payload="scalable"),
Button("It's fun", payload="fun"),
Button("The mascot 🦜 is cool", payload="pako"),
]
)
say Dropdown(
// Mandatory list of options
options=[
Button("It's easy to learn", payload="easy"),
Button("It's pretty quick", payload="fast"),
Button("It's scalable", payload="scalable"),
Button("It's fun", payload="fun"),
Button("The mascot 🦜 is cool", payload="pako"),
],
// Optional parameters
title="Why do you like CSML?",
description="Select the principal reason!",
placeholder="They are all good reasons...",
selected="easy", // value selected by default
submit_label="Yes, that's it!",
)
start:
say LaTeX(
"\(x^2 + y^2 = z^2\)",
// If the user has "audio mode" enabled the tts parameter
// will be used as the basis for the speech synthesis
tts="This is the Pythagorean theorem!",
)
say LaTeX("\\def\\arraystretch{1.5}
\\begin{array}{c:c:c}
a & b & c \\\\ \\hline
d & e & f \\\\
\\hdashline
g & h & i
\\end{array}")
say "This equation {latex} \(x^2 + y^2 = z^2\) {/latex} is super cool"
// Display a simple signature field
say Signature()
// The field can be customized (all parameters are optional)
say Signature(
"Please sign here!",
description="Yes please do!",
submit_label="I consent"
)